"The doctor of the future will give no medicine, but will interest her or his patients in the care of the human frame, in a proper diet, and in the cause and prevention of disease." ~Thomas Edison
scroll down to see all the entries under this "Natural Health" tab
scroll down to see all the entries under this "Natural Health" tab
Winter Immune Support in Food and Routine
Dr. Rachelle Price, ND
2015
Winter is here and whether you find yourself playing outside or working indoors, taking preventative steps to keep you and your family throughout the winter will make the season much more enjoyable.
The immune system is our body’s way of fighting off colds, flus and other bugs. When functioning properly, it keeps us feeling healthy and maintains enough our energy and ability to work, play, concentrate and do what we do every day. Catching a cold can be expensive, time-consuming and a source of stress in our lives. Preventing colds and flus is a great way to maintain physical, emotional and mental well- being.
There are many ways to support your body’s immune system this fall to stay strong and healthy. Considering what you eat is a great place to start – this begins with what you stock the cupboards with. For example, cooking from scratch, using mainly whole foods, is much better for your immune system and overall health than packaged foods or often restaurant food.
When deciding on what foods to stock your kitchen with, it is best to look for whole foods, unrefined and unprocessed foods. A whole food is just that --the only ingredient it contains is the one food itself. For example, foods that can be grown such as vegetables, fruits, nuts, seeds and beans are whole foods. These whole foods also have a better balance of vitamins, minerals, fiber and other nutrients than just part of the food (such as fruit juice or a seed oil). Whole foods are unprocessed and unrefined. The more whole foods you and your family eat and the less refined, processed and treated foods you eat, the healthier you will be now in the cold and flu season and in the future. Eating a colorful variety of whole foods will give yourself the nutrients and energy you need to thrive, as well as help to fight off infections.
Avoiding sugars may be the most important dietary change to make to support your immune system, especially when you begin to feel sick. This includes any refined or processed sugars and sweeteners, but even minimizing natural sweeteners such as juices is important. Also, avoiding any foods you are sensitive to or have an allergy to will reduce inflammation so the body can re-focus its resources where it is most needed. The most common food allergens are gluten, wheat, dairy, eggs, corn and soy.
There are some foods and herbs in particular that are of benefit to the immune system. For example, the various forms of vitamin A and carotenes are necessary to build the cells of the immune system (immunoglobulins, lymphocytes and more). These vitamins are found in sweet potatoes, squash, carrots, cantaloupe, broccoli, green leafy vegetables (including dark lettuce), mangos, apricots, peaches, red peppers, pink grapefruit, pumpkins, and tomato sauce/paste. Some animal products also contain high amounts of Vitamin A such as liver, cod-liver oil, and whole dairy products including whole milk, cheese, and butter, as well as fish (tuna, sardines, and herring).
Vitamin C and Zinc are essential nutrients for the immune system. Adequate intakes of these nutrients can help prevent colds and flus by allowing the immune system access to them as soon as you are exposed to an infectious agent. Increasing your intake of vitamin C and zinc when you start to feel sick will help replenish their quickly depleting reserves. Vitamin C and Zinc has been shown to relieve symptoms and shorten the duration of respiratory tract infections, including the common cold. Vitamin C is found in citrus, peppers, melons, berries, tomatoes, green peppers, parsley, green fresh vegetables, cantaloupes, strawberries, cabbage, turnips and many other vegetables and fruits. The form of zinc that is very available to the body is found in high levels in meat, eggs, and seafood (especially oysters). Yogurt, almonds, peanuts, beans and whole grains also contain zinc.
Garlic, onions and ginger contain volatile oils that are anti-microbial (can fight viruses, bacteria and even fungal infections) and are excellent to incorporate into almost any meal. Mushrooms also have medicinal value, supporting the immune system and fighting infections once they’ve entered the body. Incorporating mushrooms into soups, stews, and stir-fries is a simple and delicious way to support your health.
Taking a probiotic supplement (the beneficial gut bacteria) or eating probiotics as fermented foods and other support for the digestive system also has a direct effect on the immune system. Not only is most of the body's immune system located in the gastro-intestinal system, a healthy gut as I like to call it will also help you absorb more vitamins and nutrients for the food you eat which in turn provides the immune system with the resources it needs to fight colds, flus and other infections going around. Probiotics are found in truly fermented foods such as Sauer kraut, kimchi and other fermented veggies. They are also found in yogurt, and fermented beverages such as kefir, kombucha or homemade ginger bugs. Make sure there are active live cultures existing if you purchase these foods or better yet, make them yourself! The books, Wild Fermentations and Nourishing Traditions have a collection of good recipes for fermented foods, some of which can also be found on the Internet. Taking a probiotic supplement, especially if you have a weak GI system or are feeling sick can also help. Prebiotics are foods that contain certain fibers (such as inulin) that feed beneficial gut bacteria (probiotics), which stimulates their activity and thus also supports a healthy GI system. Some foods that are prebiotics include: Jerusalem artichoke, dandelion, asparagus, banana, barley, chicory root, garlic, honey, leeks, mushrooms, onion, oats and rye. Cooked cabbage and cabbage juice are also very supportive of the GI track as cabbage is high in the amino acid glutamine. Getting enough fiber in the diet to help with elimination also helps the body to function properly. Fiber is found in vegetables, fruits, beans, and whole grains.
Besides choosing to eat healthy, simple lifestyle changes can keep us functioning with optimal energy, a clear mind and healthy immune system. Getting to bed early enough for a restful sleep so that you wake rested and without an alarm is a great place to begin. Try getting to bed 5- 15 minutes earlier each night until to reach your target bedtime and then try to keep bedtime and the time you get out of bed consistent each day. A goal of 7-10 hours of sleep at night is usually enough for most. Growing children and teens need more than adults, but listen to your body. A routine of adequate rest is one of the best ways to keep your immune system healthy and REST is the best treatment once you begin to feel sick, even if it means something may have to wait a few days.
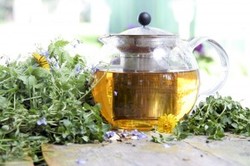
Drinking plenty of water is essential for energy and all body functions, including that of the immune system. Dehydration reduces energy and can cause headaches. A good goal is to make it a routine to drink one-third to half of your body weight in ounces of water each day. Keep water glasses or bottles full where you spend most of your time to remind yourself to drink and enjoy plenty of caffeine-free herbal teas in this winter season.
Speaking of herbs, there are some common herbs that help fight infections and/or support the immune system. Using culinary herbs such as thyme, oregano, basil and rosemary will help your body fight infections while using teas such as chamomile can help promote restful sleep when taken at night. Honey and lemon in tea are also anti-microbial and go great with fresh ginger tea, an excellent anti-microbial and digestive aid. Honey and other soothing herbs such as slippery elm, marshmallow and licorice root can help soothe sore throats. Especially when taking herbs, you should always consult your naturopathic doctor to help develop a health plan that is individually tailored for you and your body's needs.
So as we enter fall and winter, plan ahead and keep your kitchen (garden, root cellar etc.) stocked with plenty of immune-boosting foods (see below for immune supportive recipes for soup and smoothie/ice cream), sources of probiotics as well as immune supportive herbs and spices. Creating routines to get enough sleep, water and exercise as well as finding ways to nourish your soul and handle sources of stress will boost your immune system and prepare you and your family for an enjoyable season.
I wish you and your family health and joy this winter!
~Dr. Rachelle
Immune Supportive Recipes...
Immune Support Soup:
This tasty soup is nourishing, hearty and slow-cooked, allowing for easy absorption of the immune-supportive nutrients it contains. Any other vegetables may be added such as peppers or kale. The soup stock is best homemade as it increases the nutrient density and is a great way to get the most out of chicken or other bones. If you prefer vegetarian, you can collect the unused scraps of onions and veggies in a container in your freezer until you are ready to make a vegetable stock.
Ingredients
• 2 quarts chicken, vegetable or other meat stock
• 2-6 sliced uncooked chicken breast or thighs if desired (or use a whole chicken and create the stock as the soup cooks)
• 5-10 cloves garlic (more or less to taste), peeled and chopped
• 1 -2 large onions, peeled and chopped
• 2 or more cups mushrooms (shiitake are best but others can be used), sliced
• 1-2 large sweet potatoes
• 2-4 carrots
• Ginger, 2 thumb-sized pieces or larger – shredded with grater or sliced
• 2 cups green cabbage, slice or shred
• Tamari or soy sauce (or salt) and miso to taste
• 1/2-3 teaspoons of crushed red pepper flakes (depending on how spicy you like it)
• Other fresh or dried spices such as oregano, thyme, to taste (optional)
• 1 can of coconut milk
Directions
Simmer the onions, garlic, ginger, cabbage and mushrooms in stock for 1 hour. Check periodically to make sure the water doesn’t boil away; add more water as necessary. During the last 20 minutes or so, add the chicken, sweet potatoes and carrots. Also add dried spices if using them, including the red pepper flakes (if fresh spices, add at the end). Then add the coconut milk and simmer for another 10 minutes, without boiling. Remove from heat. Add tamari (or salt), miso and other fresh seasonings to the broth. A squeeze of fresh lemon or lime also tastes good right before serving.
A second option is to just put it all in a crock pot until the chicken is well done.
Enjoy with a cup of herbal tea and plenty of rest. Cheers to your health!
Anti-inflammatory Immune Booster Smoothie or Ice Cream:
The bananas make this a delicious naturally sweetened allergy-friendly creamy smoothie or ice cream. Berries (or even a little honey or maple syrup) may replace the bananas if desired. The herbs and supplements I use are high quality, purchased from Emerson Ecologics (www.emersonecologics.com). This particular recipe is targeted towards food allergies/immune system support. It can be made thicker and frozen into an ice cream treat.
Many things in this recipe can be substituted and I've enjoyed several variations but here is one of my favorites:
Ingredients:
Directions:
1. Combine and bend well until desired consistency. I like to blend my cacao, hemp and flaxseed first to ensure they are ground well for absorption.
2. Drink as a smoothie or pour a thicker mixture into a container to freeze into ice cream.
3. If making ice cream, let thaw 5-10 minutes before serving. Enjoy the creamy taste and health benefits!
Dr. Rachelle Price, ND
2015
Winter is here and whether you find yourself playing outside or working indoors, taking preventative steps to keep you and your family throughout the winter will make the season much more enjoyable.
The immune system is our body’s way of fighting off colds, flus and other bugs. When functioning properly, it keeps us feeling healthy and maintains enough our energy and ability to work, play, concentrate and do what we do every day. Catching a cold can be expensive, time-consuming and a source of stress in our lives. Preventing colds and flus is a great way to maintain physical, emotional and mental well- being.
There are many ways to support your body’s immune system this fall to stay strong and healthy. Considering what you eat is a great place to start – this begins with what you stock the cupboards with. For example, cooking from scratch, using mainly whole foods, is much better for your immune system and overall health than packaged foods or often restaurant food.
When deciding on what foods to stock your kitchen with, it is best to look for whole foods, unrefined and unprocessed foods. A whole food is just that --the only ingredient it contains is the one food itself. For example, foods that can be grown such as vegetables, fruits, nuts, seeds and beans are whole foods. These whole foods also have a better balance of vitamins, minerals, fiber and other nutrients than just part of the food (such as fruit juice or a seed oil). Whole foods are unprocessed and unrefined. The more whole foods you and your family eat and the less refined, processed and treated foods you eat, the healthier you will be now in the cold and flu season and in the future. Eating a colorful variety of whole foods will give yourself the nutrients and energy you need to thrive, as well as help to fight off infections.
Avoiding sugars may be the most important dietary change to make to support your immune system, especially when you begin to feel sick. This includes any refined or processed sugars and sweeteners, but even minimizing natural sweeteners such as juices is important. Also, avoiding any foods you are sensitive to or have an allergy to will reduce inflammation so the body can re-focus its resources where it is most needed. The most common food allergens are gluten, wheat, dairy, eggs, corn and soy.
There are some foods and herbs in particular that are of benefit to the immune system. For example, the various forms of vitamin A and carotenes are necessary to build the cells of the immune system (immunoglobulins, lymphocytes and more). These vitamins are found in sweet potatoes, squash, carrots, cantaloupe, broccoli, green leafy vegetables (including dark lettuce), mangos, apricots, peaches, red peppers, pink grapefruit, pumpkins, and tomato sauce/paste. Some animal products also contain high amounts of Vitamin A such as liver, cod-liver oil, and whole dairy products including whole milk, cheese, and butter, as well as fish (tuna, sardines, and herring).
Vitamin C and Zinc are essential nutrients for the immune system. Adequate intakes of these nutrients can help prevent colds and flus by allowing the immune system access to them as soon as you are exposed to an infectious agent. Increasing your intake of vitamin C and zinc when you start to feel sick will help replenish their quickly depleting reserves. Vitamin C and Zinc has been shown to relieve symptoms and shorten the duration of respiratory tract infections, including the common cold. Vitamin C is found in citrus, peppers, melons, berries, tomatoes, green peppers, parsley, green fresh vegetables, cantaloupes, strawberries, cabbage, turnips and many other vegetables and fruits. The form of zinc that is very available to the body is found in high levels in meat, eggs, and seafood (especially oysters). Yogurt, almonds, peanuts, beans and whole grains also contain zinc.
Garlic, onions and ginger contain volatile oils that are anti-microbial (can fight viruses, bacteria and even fungal infections) and are excellent to incorporate into almost any meal. Mushrooms also have medicinal value, supporting the immune system and fighting infections once they’ve entered the body. Incorporating mushrooms into soups, stews, and stir-fries is a simple and delicious way to support your health.
Taking a probiotic supplement (the beneficial gut bacteria) or eating probiotics as fermented foods and other support for the digestive system also has a direct effect on the immune system. Not only is most of the body's immune system located in the gastro-intestinal system, a healthy gut as I like to call it will also help you absorb more vitamins and nutrients for the food you eat which in turn provides the immune system with the resources it needs to fight colds, flus and other infections going around. Probiotics are found in truly fermented foods such as Sauer kraut, kimchi and other fermented veggies. They are also found in yogurt, and fermented beverages such as kefir, kombucha or homemade ginger bugs. Make sure there are active live cultures existing if you purchase these foods or better yet, make them yourself! The books, Wild Fermentations and Nourishing Traditions have a collection of good recipes for fermented foods, some of which can also be found on the Internet. Taking a probiotic supplement, especially if you have a weak GI system or are feeling sick can also help. Prebiotics are foods that contain certain fibers (such as inulin) that feed beneficial gut bacteria (probiotics), which stimulates their activity and thus also supports a healthy GI system. Some foods that are prebiotics include: Jerusalem artichoke, dandelion, asparagus, banana, barley, chicory root, garlic, honey, leeks, mushrooms, onion, oats and rye. Cooked cabbage and cabbage juice are also very supportive of the GI track as cabbage is high in the amino acid glutamine. Getting enough fiber in the diet to help with elimination also helps the body to function properly. Fiber is found in vegetables, fruits, beans, and whole grains.
Besides choosing to eat healthy, simple lifestyle changes can keep us functioning with optimal energy, a clear mind and healthy immune system. Getting to bed early enough for a restful sleep so that you wake rested and without an alarm is a great place to begin. Try getting to bed 5- 15 minutes earlier each night until to reach your target bedtime and then try to keep bedtime and the time you get out of bed consistent each day. A goal of 7-10 hours of sleep at night is usually enough for most. Growing children and teens need more than adults, but listen to your body. A routine of adequate rest is one of the best ways to keep your immune system healthy and REST is the best treatment once you begin to feel sick, even if it means something may have to wait a few days.
Drinking plenty of water is essential for energy and all body functions, including that of the immune system. Dehydration reduces energy and can cause headaches. A good goal is to make it a routine to drink one-third to half of your body weight in ounces of water each day. Keep water glasses or bottles full where you spend most of your time to remind yourself to drink and enjoy plenty of caffeine-free herbal teas in this winter season.
Speaking of herbs, there are some common herbs that help fight infections and/or support the immune system. Using culinary herbs such as thyme, oregano, basil and rosemary will help your body fight infections while using teas such as chamomile can help promote restful sleep when taken at night. Honey and lemon in tea are also anti-microbial and go great with fresh ginger tea, an excellent anti-microbial and digestive aid. Honey and other soothing herbs such as slippery elm, marshmallow and licorice root can help soothe sore throats. Especially when taking herbs, you should always consult your naturopathic doctor to help develop a health plan that is individually tailored for you and your body's needs.
So as we enter fall and winter, plan ahead and keep your kitchen (garden, root cellar etc.) stocked with plenty of immune-boosting foods (see below for immune supportive recipes for soup and smoothie/ice cream), sources of probiotics as well as immune supportive herbs and spices. Creating routines to get enough sleep, water and exercise as well as finding ways to nourish your soul and handle sources of stress will boost your immune system and prepare you and your family for an enjoyable season.
I wish you and your family health and joy this winter!
~Dr. Rachelle
Immune Supportive Recipes...
Immune Support Soup:
This tasty soup is nourishing, hearty and slow-cooked, allowing for easy absorption of the immune-supportive nutrients it contains. Any other vegetables may be added such as peppers or kale. The soup stock is best homemade as it increases the nutrient density and is a great way to get the most out of chicken or other bones. If you prefer vegetarian, you can collect the unused scraps of onions and veggies in a container in your freezer until you are ready to make a vegetable stock.
Ingredients
• 2 quarts chicken, vegetable or other meat stock
• 2-6 sliced uncooked chicken breast or thighs if desired (or use a whole chicken and create the stock as the soup cooks)
• 5-10 cloves garlic (more or less to taste), peeled and chopped
• 1 -2 large onions, peeled and chopped
• 2 or more cups mushrooms (shiitake are best but others can be used), sliced
• 1-2 large sweet potatoes
• 2-4 carrots
• Ginger, 2 thumb-sized pieces or larger – shredded with grater or sliced
• 2 cups green cabbage, slice or shred
• Tamari or soy sauce (or salt) and miso to taste
• 1/2-3 teaspoons of crushed red pepper flakes (depending on how spicy you like it)
• Other fresh or dried spices such as oregano, thyme, to taste (optional)
• 1 can of coconut milk
Directions
Simmer the onions, garlic, ginger, cabbage and mushrooms in stock for 1 hour. Check periodically to make sure the water doesn’t boil away; add more water as necessary. During the last 20 minutes or so, add the chicken, sweet potatoes and carrots. Also add dried spices if using them, including the red pepper flakes (if fresh spices, add at the end). Then add the coconut milk and simmer for another 10 minutes, without boiling. Remove from heat. Add tamari (or salt), miso and other fresh seasonings to the broth. A squeeze of fresh lemon or lime also tastes good right before serving.
A second option is to just put it all in a crock pot until the chicken is well done.
Enjoy with a cup of herbal tea and plenty of rest. Cheers to your health!
Anti-inflammatory Immune Booster Smoothie or Ice Cream:
The bananas make this a delicious naturally sweetened allergy-friendly creamy smoothie or ice cream. Berries (or even a little honey or maple syrup) may replace the bananas if desired. The herbs and supplements I use are high quality, purchased from Emerson Ecologics (www.emersonecologics.com). This particular recipe is targeted towards food allergies/immune system support. It can be made thicker and frozen into an ice cream treat.
Many things in this recipe can be substituted and I've enjoyed several variations but here is one of my favorites:
Ingredients:
- 1-2 frozen bananas (I peel ripe bananas, break them into quarters and store them in a ziplock in the freezer for ease of use later). I use more for ice cream or dessert smoothies as this is the sweetener.
- 1/2-2 cups oat milk (or any alternative milk such as coconut, hemp, almond... or water). I use more if it's a liquid smoothie and less if I'd like to keep it thick and creamy for ice cream.
- 6 Tablespoons of hemp seeds (or other protein powder such as Ancient Nutrition Bone Broth Powder) - provides protein and omega-3 fatty acids
- 3 Tablespoons flaxseed - provides fiber and omega-3 fatty acids
- 3 Tablespoons pure cacao (nibs or powder) - I like the crunchy texture of the nibs but usually add some powder also. Provides antioxidants.
- 1 teaspoon mushroom powder (Maitake, Shitake, Reishi, lions mane etc) - great immune boosting foods! I use www.emersonecologics.com/Products/EmersonMain/PID-CS0485.aspx
- 2 teaspoons glutamine powder - great for helping GI system issues such as leaky gut/food allergies
- 1/4-1 teaspoon powdered probiotic - use serving size on product. I use www.emersonecologics.com/Products/EmersonMain/PID-THE10.aspx
- vanilla - I use a sprinkle of powdered pods. If you use tincture it could taste slightly alcoholic depending on quantity.
- Optional: turmeric or other anti-inflammatory herbs, though it changes the flavor slightly. Cinnamon for blood sugar stabilization. Cod liver oil or whole avocado for essential fatty acids. Berries or extracts (flavenoids). Most any liquid or powdered supplement may be added.
Directions:
1. Combine and bend well until desired consistency. I like to blend my cacao, hemp and flaxseed first to ensure they are ground well for absorption.
2. Drink as a smoothie or pour a thicker mixture into a container to freeze into ice cream.
3. If making ice cream, let thaw 5-10 minutes before serving. Enjoy the creamy taste and health benefits!
Sleep Well, Naturally: 7 Steps to Great Zzzz’s
May 13, 2015
By: Dr. Aviva Romm
From: http://avivaromm.com/sleep-well-7-natural-tips-for-getting-great-zzzzz?inf_contact_key=fe3377868dc0bf844c16fbe33766149fcbc1d5a3a1d803b3b4ba2013bd58b220
7 Steps to Great Zzz’s:
1. Turn Your Lights Down Low. While some lucky girls can fall asleep with a jackhammer going outside their bedroom window (actually, it’s mostly the men that can do this, eh?), the rest of us need a somewhat quieter ambiance. Unfortunately, if you have sleep problems, you may have begun to equate your bedroom with a place of misery rather than rest.
Here’s how to create a sleep-promoting environment.
2. Get A Head Start. Good sleep starts long before you hit the pillow. In fact, your daytime and evening habits can have a major impact on your ability to get to sleep at night. Start planning for a good night’s sleep hours before bed by:
3. Power Down. Many of us live “tired and wired” – we’re dragging all day and then can’t sleep at night. Being “plugged in” to computers, email, and Iphones all day and evening exposes us to electromagnetic waves that potentially interfere with sleep, and also keeps us plugged into our endless “to-do’s” that prevent us from ever turning it all off and getting rest.
This same tired and wired phenomenon puts stress on our adrenal glands, the hormones that pump out stress hormones, leading to some of the medical problems associated with insomnia.
If you are going to improve your sleep, this means powering down for a designated couple of stress-free hours before bed. Relaxation skills practiced once you get into bed can increase your chances of getting to sleep – and having it be restful. Audio materials to support meditation and guided visualization are available for free on the Internet and on downloadable IPhone apps (listening to these is the one exception to the ‘no electronics in the bedroom’ rule).
Additionally, there are a number of yoga sequences that can help you unwind your body and your mind prior to bed. YogaGlo, a fantastic website with a wealth of recorded yoga classes with well-known teachers, offers a selection of yoga classes to help you relax. Do a class an hour before bed, then take an aromatherapy bath to help you decompress before you sleep.
4. Gotta’ Have Rhythm. Human beings evolved with natural day and night cycles – also called circadian rhythms. These rhythms control the hormones, for example, melatonin, which influence our sleep-wake cycles. Getting up at the same time each morning, followed by physical activity with exposure to outdoor light (e.g., a walk outside) or even just sitting next to a window with the shades and curtains open, may be beneficial, even on a cloudy day. If you have severe insomnia, using a light box for 30-40 minutes upon waking each morning might help. A completely dark environment is recommended at night for sleep. Benefits usually take 2-3 weeks to become apparent and the practice may need to be maintained indefinitely.
5. Do Your Worrying BEFORE Bed. I have my patients start a pro-sleep journal – any blank notebook will do. One hour before bed they write out all of their worries and concerns, including their to-do list for the next day. Doing this allows you go to sleep with a clearer head. Oh, and did I say vent in there, too? Never go to sleep angry. Even if you do sleep you’ll have rough dreams. After you’ve done your writing, read something inspirational for a few minutes. I highly recommend Tara Bennet Goleman’s Mind Whispering as a start. My patients tell me this whole practice works wonders. [Just don’t do it in your bedroom!]
6. Soak It Up. A hot aromatherapy bath before bed can relax your mind and your muscles. Add 1 cup of Epsom salts and 5-7 drops of pure lavender essential oil to your tub of hot water. SOAK away your day’s troubles. Lavender promotes relaxation and sleep. This can be done nightly just prior to going to bed and is safe for pregnant and nursing mothers, too.
7. Herbs and Supplements
Herbs are my first go-to medicines. Botanical – or herbal – medicines are gentle, non-addictive alternatives to sleep medications. I use them, along with several nutritional supplements to help my patients sleep and they LOVE the results! You can combine any (or all) of these safely and the herbal extracts can be put right into your chamomile tea!
As a rule I recommend not combining herbs and medications without the supervision of a physician skilled in the use of botanicals.
Lavela (lavender oil)
Fast becoming my favorite product for sleep and anxiety, Lavela is a proprietary lavender oil product so look for this brand. (I have no conflict of interest). It’s super easy to take – one pill about an hour before bedtime. It’s also helpful if you suffer with anxiety that keeps you awake, performance anxiety, or test anxiety. I’ve even had several patients come off of long-term benzodiazepines (you have to work with your doctor to taper off of these medications!).
Chamomile
Peter Rabbit’s mama knew just what to give Peter to help him sleep! Chamomile tea can be sipped throughout the evening in the hours before sleep – up to 2 cups of a strong brewed tea (use 2 teabags per cup or 2 TBS of loose herb) and steep for 10 minutes with a lid on the cup. Just remember to pee before bed or you’ll be waking up from a sound sleep! Alternatively, you can use the tincture, 40 drops 1 hour and again 30 minutes prior to sleep.
Passionflower
This herb has been used traditionally to promote sleep, and some evidence shows that it can actually improve sleep quality – thus it can help you stay asleep and feel more rested when you wake. It is also useful in the treatment of anxiety disorders. A typical dose is 40-60 drops of the tincture (or 320 mg in a capsule) up to 3 times daily. It can be taken an hour before sleep and again right before sleep at this dose. Limited data suggests safety in pregnancy but I would avoid it during the first trimester and not use for extended periods of time during pregnancy.
California poppy
California poppy is widely used by herbalists for its sedative effects. It is quite strong and should not be taken during the day or before driving. It is also a gentle analgesic and muscle relaxant. A typical dose is 20-30 drops before bed.
Hops
With a long traditional history as a sleep herb, this mildly estrogenic herb is a common beer ingredient and is wonderful for promoting deep sleep. I recommend the tincture (alcohol extract) to be taken in doses of 30 drops, 1 hour and again 30 minutes before going to sleep. It’s too strong for daytime use, should not be combined with alcohol, and should not be used if you suffer from moderate to severe depression or have a history of estrogen receptor positive breast cancer.
Ashwagandha
An herb with roots in Ayurvedic medicine, this herb is specific for the “tired and wired,” and as such not only helps sleep in the short run, but helps relieve “adrenal fatigue” and burnout when taken for at least 3-6 months or longer. It improves cognitive function, immunity, and stress resilience as well. The dose is 1 to 6 grams daily of the whole herb in capsule or tea form. The tea is prepared by boiling ashwagandha roots in water for 15 minutes and then cooling, or adding 1 tsp. of the powder to hot water or warm whole milk and steeping for 10 minutes before drinking. The usual dose is 3 cups daily. Tincture dose is 40-60 drops 3 times daily. There is no known safety data in pregnancy; I recommend it as safe during breastfeeding.
Melatonin
While not effective for everyone, individuals with sleep latency syndrome and those with melatonin deficiency may get moderate improvement from taking 1-3 mg in the hour before bed. Menopausal hot flashers may also get some relief and sleep from this remedy. This dose is considered safe for a duration of up to several months at a time. Not recommended during pregnancy.
5-HTP
5-Hydroxytryptophan (5-HTP), a product of the amino acid tryptophan, is converted into serotonin in the brain. Serotonin helps to initiate calm and sleep and reduces nighttime awakenings. A typical dose is 100-300 mg three times daily. Not recommended during pregnancy.
Calcium and Magnesium
A combination calcium (800 mg) and magnesium supplement (400 mg), or magnesium alone if you are avoiding calcium supplementation due to cardiac disease, can promote relaxation and sleep. They can also help if restless leg syndrome or muscle cramps interfere with your sleep, and can be helpful during pregnancy.
Relaxing Sleep Tonic by Herb Pharm, and Sleep and Relax Tea by Gaia Herbs are two reliable over-the-counter products you can find in most stores. Muscle Cramp/Tension formula by Pure Encapsulations is another excellent formula that combines the recommended herbs along with calcium and magnesium.
When to See Your Doctor: If sleep troubles persist after 3 months of trying these tips, or if you have other medical symptoms, please talk with your primary physician who can evaluate you for sleep disorders, sleep apnea, and medical problems that can interfere with sleep, for example, depression and fibromyalgia. There are a number of medications that can be used to treat insomnia, however, many are addictive or have significant side effects, and so trying a natural approach first, if there are no associated medical problems, is a healthy choice. Sleep apnea must be treated with appropriate medical care in addition to the options above.
Sleep well,
Aviva
May 13, 2015
By: Dr. Aviva Romm
From: http://avivaromm.com/sleep-well-7-natural-tips-for-getting-great-zzzzz?inf_contact_key=fe3377868dc0bf844c16fbe33766149fcbc1d5a3a1d803b3b4ba2013bd58b220
7 Steps to Great Zzz’s:
1. Turn Your Lights Down Low. While some lucky girls can fall asleep with a jackhammer going outside their bedroom window (actually, it’s mostly the men that can do this, eh?), the rest of us need a somewhat quieter ambiance. Unfortunately, if you have sleep problems, you may have begun to equate your bedroom with a place of misery rather than rest.
Here’s how to create a sleep-promoting environment.
- Make your bedroom your sanctuary – your place of peace and respite.
- Use your bed for sleep (and sex) only.
- Keep your bedroom temperature comfortable or even slightly on the cooler side.
- Make your bedroom an electronics-free zone: no TV, computers, or other electronics in there – ever. (Small apartment? Get a room divider to separate your sleep and desk area.)
- Reduce ambient noise and light; a flax eye pillow or an eye mask and earplugs can work wonders!
- Paint and decorate your bedroom in restful colors (apparently purple and grey are very bad choices, blue is the best, and neutrals and yellows pretty good).
- Make sure you have a comfortable mattress, pillows, and bedding.
2. Get A Head Start. Good sleep starts long before you hit the pillow. In fact, your daytime and evening habits can have a major impact on your ability to get to sleep at night. Start planning for a good night’s sleep hours before bed by:
- Avoiding caffeinated beverages after lunch (if you’re super sensitive, this includes green tea – and chocolate, too)
- Avoiding alcohol, especially near bedtime
- Avoiding smoking or other nicotine intake, especially during the evening
- Avoiding daytime naps
- Exercising regularly for at least 20 minutes daily, but preferably more than four hours prior to bedtime
- Eating no later than three hours before bed and avoid foods that cause acid reflux (heartburn) if you suffer from it
3. Power Down. Many of us live “tired and wired” – we’re dragging all day and then can’t sleep at night. Being “plugged in” to computers, email, and Iphones all day and evening exposes us to electromagnetic waves that potentially interfere with sleep, and also keeps us plugged into our endless “to-do’s” that prevent us from ever turning it all off and getting rest.
This same tired and wired phenomenon puts stress on our adrenal glands, the hormones that pump out stress hormones, leading to some of the medical problems associated with insomnia.
If you are going to improve your sleep, this means powering down for a designated couple of stress-free hours before bed. Relaxation skills practiced once you get into bed can increase your chances of getting to sleep – and having it be restful. Audio materials to support meditation and guided visualization are available for free on the Internet and on downloadable IPhone apps (listening to these is the one exception to the ‘no electronics in the bedroom’ rule).
Additionally, there are a number of yoga sequences that can help you unwind your body and your mind prior to bed. YogaGlo, a fantastic website with a wealth of recorded yoga classes with well-known teachers, offers a selection of yoga classes to help you relax. Do a class an hour before bed, then take an aromatherapy bath to help you decompress before you sleep.
4. Gotta’ Have Rhythm. Human beings evolved with natural day and night cycles – also called circadian rhythms. These rhythms control the hormones, for example, melatonin, which influence our sleep-wake cycles. Getting up at the same time each morning, followed by physical activity with exposure to outdoor light (e.g., a walk outside) or even just sitting next to a window with the shades and curtains open, may be beneficial, even on a cloudy day. If you have severe insomnia, using a light box for 30-40 minutes upon waking each morning might help. A completely dark environment is recommended at night for sleep. Benefits usually take 2-3 weeks to become apparent and the practice may need to be maintained indefinitely.
5. Do Your Worrying BEFORE Bed. I have my patients start a pro-sleep journal – any blank notebook will do. One hour before bed they write out all of their worries and concerns, including their to-do list for the next day. Doing this allows you go to sleep with a clearer head. Oh, and did I say vent in there, too? Never go to sleep angry. Even if you do sleep you’ll have rough dreams. After you’ve done your writing, read something inspirational for a few minutes. I highly recommend Tara Bennet Goleman’s Mind Whispering as a start. My patients tell me this whole practice works wonders. [Just don’t do it in your bedroom!]
6. Soak It Up. A hot aromatherapy bath before bed can relax your mind and your muscles. Add 1 cup of Epsom salts and 5-7 drops of pure lavender essential oil to your tub of hot water. SOAK away your day’s troubles. Lavender promotes relaxation and sleep. This can be done nightly just prior to going to bed and is safe for pregnant and nursing mothers, too.
7. Herbs and Supplements
Herbs are my first go-to medicines. Botanical – or herbal – medicines are gentle, non-addictive alternatives to sleep medications. I use them, along with several nutritional supplements to help my patients sleep and they LOVE the results! You can combine any (or all) of these safely and the herbal extracts can be put right into your chamomile tea!
As a rule I recommend not combining herbs and medications without the supervision of a physician skilled in the use of botanicals.
Lavela (lavender oil)
Fast becoming my favorite product for sleep and anxiety, Lavela is a proprietary lavender oil product so look for this brand. (I have no conflict of interest). It’s super easy to take – one pill about an hour before bedtime. It’s also helpful if you suffer with anxiety that keeps you awake, performance anxiety, or test anxiety. I’ve even had several patients come off of long-term benzodiazepines (you have to work with your doctor to taper off of these medications!).
Chamomile
Peter Rabbit’s mama knew just what to give Peter to help him sleep! Chamomile tea can be sipped throughout the evening in the hours before sleep – up to 2 cups of a strong brewed tea (use 2 teabags per cup or 2 TBS of loose herb) and steep for 10 minutes with a lid on the cup. Just remember to pee before bed or you’ll be waking up from a sound sleep! Alternatively, you can use the tincture, 40 drops 1 hour and again 30 minutes prior to sleep.
Passionflower
This herb has been used traditionally to promote sleep, and some evidence shows that it can actually improve sleep quality – thus it can help you stay asleep and feel more rested when you wake. It is also useful in the treatment of anxiety disorders. A typical dose is 40-60 drops of the tincture (or 320 mg in a capsule) up to 3 times daily. It can be taken an hour before sleep and again right before sleep at this dose. Limited data suggests safety in pregnancy but I would avoid it during the first trimester and not use for extended periods of time during pregnancy.
California poppy
California poppy is widely used by herbalists for its sedative effects. It is quite strong and should not be taken during the day or before driving. It is also a gentle analgesic and muscle relaxant. A typical dose is 20-30 drops before bed.
Hops
With a long traditional history as a sleep herb, this mildly estrogenic herb is a common beer ingredient and is wonderful for promoting deep sleep. I recommend the tincture (alcohol extract) to be taken in doses of 30 drops, 1 hour and again 30 minutes before going to sleep. It’s too strong for daytime use, should not be combined with alcohol, and should not be used if you suffer from moderate to severe depression or have a history of estrogen receptor positive breast cancer.
Ashwagandha
An herb with roots in Ayurvedic medicine, this herb is specific for the “tired and wired,” and as such not only helps sleep in the short run, but helps relieve “adrenal fatigue” and burnout when taken for at least 3-6 months or longer. It improves cognitive function, immunity, and stress resilience as well. The dose is 1 to 6 grams daily of the whole herb in capsule or tea form. The tea is prepared by boiling ashwagandha roots in water for 15 minutes and then cooling, or adding 1 tsp. of the powder to hot water or warm whole milk and steeping for 10 minutes before drinking. The usual dose is 3 cups daily. Tincture dose is 40-60 drops 3 times daily. There is no known safety data in pregnancy; I recommend it as safe during breastfeeding.
Melatonin
While not effective for everyone, individuals with sleep latency syndrome and those with melatonin deficiency may get moderate improvement from taking 1-3 mg in the hour before bed. Menopausal hot flashers may also get some relief and sleep from this remedy. This dose is considered safe for a duration of up to several months at a time. Not recommended during pregnancy.
5-HTP
5-Hydroxytryptophan (5-HTP), a product of the amino acid tryptophan, is converted into serotonin in the brain. Serotonin helps to initiate calm and sleep and reduces nighttime awakenings. A typical dose is 100-300 mg three times daily. Not recommended during pregnancy.
Calcium and Magnesium
A combination calcium (800 mg) and magnesium supplement (400 mg), or magnesium alone if you are avoiding calcium supplementation due to cardiac disease, can promote relaxation and sleep. They can also help if restless leg syndrome or muscle cramps interfere with your sleep, and can be helpful during pregnancy.
Relaxing Sleep Tonic by Herb Pharm, and Sleep and Relax Tea by Gaia Herbs are two reliable over-the-counter products you can find in most stores. Muscle Cramp/Tension formula by Pure Encapsulations is another excellent formula that combines the recommended herbs along with calcium and magnesium.
When to See Your Doctor: If sleep troubles persist after 3 months of trying these tips, or if you have other medical symptoms, please talk with your primary physician who can evaluate you for sleep disorders, sleep apnea, and medical problems that can interfere with sleep, for example, depression and fibromyalgia. There are a number of medications that can be used to treat insomnia, however, many are addictive or have significant side effects, and so trying a natural approach first, if there are no associated medical problems, is a healthy choice. Sleep apnea must be treated with appropriate medical care in addition to the options above.
Sleep well,
Aviva
Steam Inhalation of Essential Oils for Sinus Congestion, Respiratory Infections and Coughs
Dr. Rachelle Price, ND

Herbal steam inhalations are a favorite way I like to treat sinus and other respiratory infections. The moist air mixed with essential oils hydrate, warm and decongest the mucus membranes of the nose, sinuses and throat. Many essential oils are also directly anti-microbial so they can be used to help fight infection in these areas and in the lungs, and some oils can be helpful in calming coughs. As always, please check with your doctor before using this treatment, especially to receive a diagnosis. Also, sometimes antibiotics are recommended in conjunction with or in place of herbal medicine for sinus or other respiratory infections.
Directions for a steam inhalation:
Boil 2-3 cups of water and remove from heat. Position yourself so that your head is above the pot or bowl of water, somewhere around 9-24 inches away. Drape a towel over your head and the container, forming a tent. Keep your eyes closed so that when you add the essential oils it doesn't burn. Add 2-3 drops of essential oil to the water. My favorite Essential Oil for fighting respiratory tract infections and sinus congestion is Eucalyptus (Eucalyptus globulus) and thyme also works well. Chamomile, thyme and hyssop can help calm coughs. Inhale the vapor with slow deep breaths for 5-10 minutes, adding a few more drops of essential oils as needed to keep the smell fairly strong. Repeat 2-3 times a day or more often if needed until the infection or congestion clears. This can be done daily for prevention as well if you are prone to infections, around sick people etc. If you only have the fresh or dried herbs, you can make a tea and inhale the steam.
Using an essential oil diffuser:
Vaporizers and diffusers can be used with essential oils as well. Often there is a spot on top of the machine to put a few drops of oils in and sometimes it goes directly in with the water (as is the case with many diffusers). Directly inhale steam for 10-20 minutes or let it run while you are sleeping. Most have automatic shutoffs when the water gets too low. Read the directions carefully on your machine before using. I often recommend this in conjunction with the above direct steam inhalation with the boiling water (it is stronger and often more effective).
Precautions:
Consult your doctor before using essential oils. Do not use essential oils if you have allergies to the plants they are derived from. Use with caution in epilepsy, pregnancy and kidney disease. Prolonged inhalation for several hours may cause side effects. Essential oils are strong and can cause irritation if they come in direct contact with skin. Use only a few drops when doing a steam inhalation and dilute heavily in carrier oils (like olive or jojoba) if putting directly on skin. It is always best to use organic, pure essential oils.
Understanding and Treating Autoimmune Diseases
March 2014
Dr. Rachelle Price, ND

What are autoimmune diseases?
Autoimmune diseases are conditions in which the body's immune system, meant to protect us from foreign pathogens, literally attacks the body's own healthy tissue. Often a particular organ is targeted such as the thyroid, skin or joints and in some situations many parts of the body are affected. In autoimmune diseases, the immune system is over active producing large amounts of inflammation which causes various manifestations such as pain, digestive upset, skin rashes, fatigue or decreased joint mobility to name a few. Conventional treatment for most autoimmune diseases usually involves prescription drugs that suppress the body’s immune system. As a naturopathic physician, my approach to autoimmune disease involves investigating and treating the underlying cause, not just the symptoms.
There are a variety of known autoimmune diseases, such as:
What causes autoimmune diseases?
While it is not entirely known what actually causes a particular autoimmune disease, there are many proposed and possible contributors. Much of the body's immune system resides in the gut-associated lymphoid tissue of the gastrointestinal lining, which controls the body's barrier between self and non-self. Although there is a genetic predisposition to many autoimmune diseases, a condition called "leaky gut syndrome" which is associated with food allergies and sensitivities is often involved (PubMed research link: Leaky Gut and Autoimmune Diseases). In leaky gut syndrome, the normally tightly adjoining cells of the gastrointestinal track open up and food particles are thus allowed out into the rest of the body. Because these foods are now outside the confines of the gastrointestinal track, the body's immune system tags them as foreign, creating anti-bodies to common foods ingested. As long as these foods are eaten, the immune system continues to react to them, generating continuous inflammation. The boundary between self and foreign becomes blurred as the overactive immune system then cross-reacts to aspects of one's own body, targeting glands such as the thyroid. Hence autoimmunity is born. Inflammation can also settle in joints and skin causing pain and other manifestations of this gut-based problem. Gastrointestinal dysbiosis, exposure to yeast ,mold, heavy metals and other toxins and even hormonal changes such as in pregnancy may also be involved in precipitating autoimmunity.
Natural support for autoimmune diseases: While it is important to have your care managed by your doctor, these are some things to consider...
A natural approach for autoimmune disease often involves focusing on removing specific foods in the diet that can make symptoms worse, healing the gastrointestinal tract, decreasing overall inflammation in the body and supporting the body’s adrenal glands, which regulate immune function and inflammation. If you have or think you have an autoimmune disease, it is important to find a doctor familiar with the underlying causes of such diseases who will take a wholistic approach and not just consider immune system suppression. I recommend considering a naturopathic physician for your care. Depending on your specific symptoms and history, your naturopathic doctor will create a specific naturopathic treatment plan that may include: dietary recommendations, lifestyle changes, herbal, homeopathic, vitamin and/or nutrient supplementation that work together to decrease autoimmune flare-ups, calm inflammation and prevent additional autoimmune diseases in the future.
photo credit: fresh turmeric root by hbomb
Autoimmune diseases are conditions in which the body's immune system, meant to protect us from foreign pathogens, literally attacks the body's own healthy tissue. Often a particular organ is targeted such as the thyroid, skin or joints and in some situations many parts of the body are affected. In autoimmune diseases, the immune system is over active producing large amounts of inflammation which causes various manifestations such as pain, digestive upset, skin rashes, fatigue or decreased joint mobility to name a few. Conventional treatment for most autoimmune diseases usually involves prescription drugs that suppress the body’s immune system. As a naturopathic physician, my approach to autoimmune disease involves investigating and treating the underlying cause, not just the symptoms.
There are a variety of known autoimmune diseases, such as:
- Thyroid conditions such as: Hashimoto's hypothyroid, Grave's disease (hyperthyroid)
- Gastrointestinal conditions such as: Crohn's Disease, Ulcerative Colitis, Celiac Disease, Ulcerative Proctitis
- Skin conditions such as: Scleroderma, Granuloma Annulare, Psoriasis
- Joint conditions such as: Rheumatoid Arthritis, Ankylosing Spondylitis
- Systemic Lupus Erythematosus
- Type 1 Diabetes
- Reynaud's phenomena
- Multiple Sclerosis
- Sjogren's syndrome
What causes autoimmune diseases?
While it is not entirely known what actually causes a particular autoimmune disease, there are many proposed and possible contributors. Much of the body's immune system resides in the gut-associated lymphoid tissue of the gastrointestinal lining, which controls the body's barrier between self and non-self. Although there is a genetic predisposition to many autoimmune diseases, a condition called "leaky gut syndrome" which is associated with food allergies and sensitivities is often involved (PubMed research link: Leaky Gut and Autoimmune Diseases). In leaky gut syndrome, the normally tightly adjoining cells of the gastrointestinal track open up and food particles are thus allowed out into the rest of the body. Because these foods are now outside the confines of the gastrointestinal track, the body's immune system tags them as foreign, creating anti-bodies to common foods ingested. As long as these foods are eaten, the immune system continues to react to them, generating continuous inflammation. The boundary between self and foreign becomes blurred as the overactive immune system then cross-reacts to aspects of one's own body, targeting glands such as the thyroid. Hence autoimmunity is born. Inflammation can also settle in joints and skin causing pain and other manifestations of this gut-based problem. Gastrointestinal dysbiosis, exposure to yeast ,mold, heavy metals and other toxins and even hormonal changes such as in pregnancy may also be involved in precipitating autoimmunity.
Natural support for autoimmune diseases: While it is important to have your care managed by your doctor, these are some things to consider...
- Support your immune and gastrointestinal health. Over 70% of our immune system is found in our gastrointestinal track. Identify and omit food sensitivities because they are causing increased inflammation and over-activation of the immune system, contributing to the underlying autoimmune problem. Identification of food sensitivities can be done through a dietary elimination and re-challenge protocol or special blood testing, which assesses for antibody immune markers to certain foods you've been eating. A high quality and refrigerated probiotic supplement supports your gut flora and immune system.
- Ensure adequate vitamin D levels. People with autoimmune diseases often have low vitamin D levels. Ask your naturopathic doctor to monitor your blood levels and make dose recommendations accordingly.
- Decrease stress. Find ways to relax, have fun and release and deal with underlying stress. ...and not only emotional stress but physical stress as well. An injury, blood sugar imbalances or inflammation in your gastrointestinal track from food allergies all place the body under stress. Stress leads to inflammation, which perpetuates the immune dysfunction.Release and deal with the underlying causes of stress and you are on your way to improved immunity and lowered inflammation. (research link: Chronic Stress, Immune Dysregulation, and Health)
- Natural anti-inflammatories such as a high quality fish oil, turmeric, boswelia and others help reduce inflammation and can thereby reduce the pain or other complaints associated with autoimmune diseases.
A natural approach for autoimmune disease often involves focusing on removing specific foods in the diet that can make symptoms worse, healing the gastrointestinal tract, decreasing overall inflammation in the body and supporting the body’s adrenal glands, which regulate immune function and inflammation. If you have or think you have an autoimmune disease, it is important to find a doctor familiar with the underlying causes of such diseases who will take a wholistic approach and not just consider immune system suppression. I recommend considering a naturopathic physician for your care. Depending on your specific symptoms and history, your naturopathic doctor will create a specific naturopathic treatment plan that may include: dietary recommendations, lifestyle changes, herbal, homeopathic, vitamin and/or nutrient supplementation that work together to decrease autoimmune flare-ups, calm inflammation and prevent additional autoimmune diseases in the future.
photo credit: fresh turmeric root by hbomb

Health Benefits of Homemade Bone Broth
February 2013
Dr. Rachelle
For hundreds of years, people have been making broth from the bones and leftover parts of animals. When vinegar is added while simmering, the broth becomes more medicinal as the acid releases minerals and proteins from within the bones and cartilage. This virtual liquid vitamin is especially beneficial for healing and nourishing the gastrointestinal tract, immune and musculoskeletal systems. Vegetables can be used instead to make a veggie broth for a soup base, though the medicinal profile is different.
Bone broth is an excellent source of protein and calcium. It is easy to digest and absorb and is helpful in treating digestive disorders such as IBS and the stomach flu. It's vitamins and nutrients help to boost the immune system and fight colds and flus. Because it is made of bones and cartilage, it builds and nourishes joints and cartilage, and helps to heal fractures and other musculoskeletal disorders. I have recommended bone broths to patients with food allergies, autoimmune conditions, maldigestion, colic, leaky gut syndrome, malnutrition, colds, flus and more.
Try this simple recipe for homemade bone broth!
Ingredients:
Bones—from poultry, beef, lamb, fish or shellfish. Use the cooked remnants of a previous meal, with or without skin and meat , raw bones (which can be heated first in the oven for increased flavor) or bones purchased from your local butcher or grocer. You can use an entire carcass from a chicken for example, or just parts (good choices include feet, ribs, necks and knuckles)
Vegetables—peelings, ends, tops and skins or entire vegetables may be used celery, carrots, onions, garlic and parsley are most traditional, but any will do
if added towards the end of cooking, mineral content will be higher. Tip: store the tips and peelings of your veggies that you may normally discard, onion and garlic skins etc. in a freezer bag until they accumulate and you are ready to make a broth.
Vinegar—any type, 2 tablespoons per 1 quart water
Water—Filtered water to cover
Directions:
Combine all ingredients in a large stainless steel pot or pressure cooker. Bring to a boil and remove any scum that has risen to the top. Reduce heat, cover and simmer 6–24 hours (3-12 hours if using a pressure cooker). To reduce cooking time, smash or cut bones into small pieces before cooking. If desired, add vegetables in last half hour of cooking. Strain through a colander or sieve lined with cheesecloth for a clearer broth. If uncooked meat was used to start with, reserve the meat for soup or salads.
If you wish to remove the fat, use a gravy separator while the broth is warm or skim the fat off the top once refrigerated. Cold broth will gel when sufficient gelatin is present. Broth may be frozen for months or kept in the refrigerator for about 5 days.
Uses:
Dilute as a base for making soup. Use broth in place of water to cook grains or beans. Simply add salt or miso and sip the broth like tea. This is especially nice in the winter or if you’re feeling sick. It stores well in the freezer - divide into containers with the amount that you will use when you make a soup for example.
photo credit: theMaykaznie, Flickr
What is a naturopathic doctor and what role can we play in your healthcare, especially with the new Affordable Care Act?
January 2, 2014

Naturopathic doctors receive training as a family practice doctors from one of 7 accredited 4-year naturopathic medical schools in North America and Canada. Naturopathic doctors (ND's) have the same training as other medical doctors (diagnosis, using labs and imaging, use of pharmaceuticals, minor surgery etc) plus much more training in natural therapies. However, the philosophy is very different. Naturopathic Doctors focus on alleviating the root cause of illness, prevention as well as teaching to empower patients to understand their own bodies and take a more active role in their own healthcare. Though they are trained to use pharmaceutical medicines and can do so when needed, naturopathic doctors often use more natural means and work in partnernship with their patients to heal illness, rebalance the body and optimize total well-being.
Naturopathic care is based on sound patient-doctor relationships and ND's typically spend 30-60 minutes with a patient in each visit to ensure patients are heard, appropriate care is given and time is spent on patient education. ND's use modalities such as herbal medicine, nutritional supplements and vitamins, lifestyle and dietary counseling, water based therapies, physical medicine, homeopathic medicine and simple home remedies. Patients receiving naturopathic care end up using fewer prescriptions, have less referrals to specialists and less time spent in a hospital. Naturopathic care is an excellent option for primary care, to treat acute and chronic conditions, prevent illness and optimize total well-being for the whole family.
To learn more about Naturopathic Doctors and how naturopathic health care fits into the new insurance laws, listen to this interview on health currents radio with Laura Culberson Farr, executive director of the Oregon Association of Naturopathic Physicians. She is an expert on the complexities of healthcare reform and shares her knowledge about the integration of naturopathic medicine in the evolving healthcare landscape and how to make good insurance choices that provide you the best healthcare options. www.soundcloud.com/pagatim/health-currents-radio-will
The American Association of Naturopathic Physicians, at Naturopathic.org, also has great information on naturopathic doctors.
For more information on the new affordable health care act and finding an insurance plan, go to www.healthcare.gov. For specific help in your area, see www.localhelp.healthcare.gov
Resources for Eating According to the Paleo Diet

December 2013
Rachelle Price, ND
The Paleo diet is a template for eating that is similar to how our ancestors originally ate, the idea being eating and living the way our bodies were designed. The Paleo diet includes foods that were available to early people through hunting and gathering. These include foods such as: meat, fish, nuts, fruits and vegetables and avoiding foods such as sugars and carbohydrates. Below are some links to recipes, blogs and websites with great resources for understanding and following a Paleo diet. Some people find they need to adapt this diet to meet their individual needs or health concerns. Use these resources as a guide while remembering the importance of listening to your body and working with your naturopathic doctor when adapting your diet.
The Paleo Kitchen - www.primalpalate.com
Elana's Pantry - www.elanaspantry.com
Rob Wolf - www.robbwolf.com
Chris Kresser - www.chriskresser.com/beyondPaleo
Against All Grain - www.againstallgrain.com
Paleo Cupboard -- www.paleocupboard.com
See also resources for a similar diet, called the specific carbohydrate diet:
photo credit: spiced nuts by elana's pantry, flickr
Posted at Boulder Natural Health by: Dr. Rachelle Price, ND
Rachelle Price, ND
The Paleo diet is a template for eating that is similar to how our ancestors originally ate, the idea being eating and living the way our bodies were designed. The Paleo diet includes foods that were available to early people through hunting and gathering. These include foods such as: meat, fish, nuts, fruits and vegetables and avoiding foods such as sugars and carbohydrates. Below are some links to recipes, blogs and websites with great resources for understanding and following a Paleo diet. Some people find they need to adapt this diet to meet their individual needs or health concerns. Use these resources as a guide while remembering the importance of listening to your body and working with your naturopathic doctor when adapting your diet.
The Paleo Kitchen - www.primalpalate.com
- An excellent selection excellent selection of categorized recipes with beautiful photos and a recipe filter
- Blog and website written by authors of the largest Paleo cookbook on the market, Make it Paleo
- myKitchen - free online Paleo meal planner
- Menus, online store and other Paleo diet resources and information
Elana's Pantry - www.elanaspantry.com
- Website of Author of New York Time's best selling cookbook, Paleo Cooking from Elana's Pantry
- A large collection of gluten and grain-free high protein recipes with great pictures for everything from cupcakes and energy bars to full dinner menus, even vegetarian options
Rob Wolf - www.robbwolf.com
- Blog and website written by Rob Wolf, a former reserach biochemist, lecturer and best selling author of The Paleo Solution – The Original Human Diet
- Introduction and resources for the Paleo diet and lifestyle including tips on: cooking, fitness, weight loss, sleep, inflammation, celiac and autoimmunity
- Free downloadable Paleo quick start guide and Paleo solutions email series
- Various books for purchase
Chris Kresser - www.chriskresser.com/beyondPaleo
- Well respected integrative medicine practitioner, acupuncturist and Author of Your Personal Paleo Code, a new book that helps people design a healthy, personalized Paleo diet and lifestyle
- Personalized interactive Paleo diet plan called Paleologix and online program and resource center, the Personal Paleo Launch Pad, which works in conjunction with Chris' new book
- Blog and numerous articles including recent research and his clinical experience to be used as resources for understanding and living the Paleo diet and lifestyle
Against All Grain - www.againstallgrain.com
- Danielle Walker is the author of the New York Times best selling cookbook Against all Grain. After being diagnosed with an autoimmune disease when she was 22 years old, Danielle changed her diet and started her blog to help others suffering from similar ailments continue to enjoy food.
- Extensive Paleo Recipe List: Paying homage to the dishes she loved from her pre-Paleo life, Danielle has ingeniously recreated all of her favorites without grains, gluten or dairy which are easily categorized on this website and include great photos
Paleo Cupboard -- www.paleocupboard.com
- easy to use website with extensive categorized paleo recipes
- shopping guide
- blog and other paleo tips
See also resources for a similar diet, called the specific carbohydrate diet:
- Specific Carbohydrate Diet Lifestyle -- www.scdlifestyle.com recipes, blog, health podcasts, book,free online guides
- Breaking the Vicious Cycle -- www.breakingtheviciouscycle.info -- book, research, beginners guide
photo credit: spiced nuts by elana's pantry, flickr
Posted at Boulder Natural Health by: Dr. Rachelle Price, ND
Vitamin D for Optimal Health
December 3, 2013
Rachelle Price, ND

Vitamin D is a hot topic lately. This vitamin is important for many functions in our body. It is involved in our immune system's ability to fight off infections, bone health, cell communication and much more. Persons low in vitamin D may have low energy, bone pain, generalized weakness, mood changes and other symptoms.
Unlike other vitamins, we don't get much vitamin D from foods we eat. Instead our skin actually makes vitamin D from sunlight. For this reason and others, Vitamin D is thought to be more like a hormone than a vitamin. Taking supplemental Vitamin D is important especially in the winter months, in more northern latitudes and for persons with darker skin.
Having your blood level of vitamin D tested before beginning and during supplementation is important to make sure your levels are in the target range. As a naturopathic doctor, I like to see my patients vitamin D levels around 50-80 ng/mL for optimal health, though labs often make the cutoff for sufficient around 30 ng/mL. I find many of my patients, especially those taking no vitamin D, have insufficient blood levels and I often recommend them beginning to supplement with somewhere between 1,000-4,000 IU/day for a time. Vitamin D is a fat soluble vitamin so it can become toxic in high doses. For this reason, it is best to have your doctor monitor your levels and make dose recommendations accordingly.
Check out this free booklet from the vitamin D council for a lot more information on Vitamin D.
Optimizing Thyroid Health
October 30, 2013 By Dr. Rachelle Price, ND
It is estimated that more than 12 percent of Americans will develop a thyroid condition during their lifetime and up to 60 percent of those with thyroid disease are unaware of their condition. Thyroid problems are one of the most common endocrine conditions occurring today with clinical or subclinical hypothyroidism being the most common presentation. Hypothyroidism is characterized by low energy, mental slowing, depression, memory loss, weight gain, constipation, dry skin, hair loss, cold intolerance, irregular menstruation, infertility and a variety of other indications.
Hashimoto’s Disease One of the most common thyroid conditions that is overlooked in mainstream medicine is Hashimoto’s disease which is the most common autoimmune disorder in the U.S., affecting between 7-8% of the population. Hashimoto’s disease is a condition where the immune system produces antibodies that attack thyroid gland tissue. Studies have shown that 90% of hypothyroid conditions are autoimmune, mostly due to Hashimoto’s disease. Women ages 20 to 60 encompass the majority of these patients.
Many hypothyroid patients are not aware if they have Hashimoto’s disease. Often a patient is diagnosed with hypothyroidism without evaluating the autoantibodies against the thyroid (lab tests called Anti-TPO and Anti-TG). In mainstream medicine most doctors avoid testing the Hashimoto’s antibodies because it doesn’t change their treatment plan. In naturopathic medicine, distinguishing between autoimmune and non-autoimmune thyroid disease is crucial to knowing the underlying cause of the problem and how to heal the condition.
Optimize Your Thyroid Health
- Identify and eliminate any food sensitivities or food allergies. This is especially important in autoimmune thyroid conditions like Hashimoto’s disease or Grave’s disease where the immune system is over reactive. The most common food allergen that inflames autoimmune thyroid conditions is gluten. Dairy, eggs and soy are also common food allergens. IgG Antibody blood tests or phased elimination and rechallenge diets can help identify food allergens.
- Contrast hydrotherapy to the thyroid gland is slightly stimulating and can help in situations of hypothyroidism. In your daily shower, end with cold water directed over the thyroid for 30 seconds.
- Eliminate soy from the diet. As a topic of recent debate, there is some evidence that soy isoflavones can interfere with thyroid function. Especially if you are consuming large amounts of soy or soy products such as tofu, tempeh, soy milk etc, cutting this out of your diet is probably wise if you have a thyroid condition.
- Reduce raw goitrogenic foods: this category of foods includes vegetables in the brassica family such as broccoli, cauliflower, kale, cabbage, radishes. These foods eaten raw and in large amounts have been show to suppress thyroid function. Reducing your raw intake of these foods is recommended in hypothyroid conditions.
- Support and nourish your adrenal glands. If they are not functioning well, they draw from the reserves of the thyroid which can over work it. Some basic things you can do to support your adrenal glands are develop a good life routine so your body knows what to expect especially in regards to when you go to bed and wake up. Try to reduce or eliminate any stimulates in food or drink such as coffee and other sources of caffeine. These only cause the adrenals to have to work harder. Don’t burn the candle at both ends and try to do it all. Learn when to say no to take care of yourself, get plenty of sleep and practice stress-reducing techniques. Sometimes testing the adrenal glands through the saliva is necessary in determining their health status.
- Eliminate environmental and food toxins such as nitrites found in fertilizers and processed meats such as bacon, deli meats and sausages. Other chemicals such as selenocyanates found in fertilizers, perchlorates found in jet fuel and fireworks and thiocyanates interfere with thyroid function.
Ten Ways to Stay Healthy in the Midst of the Recent Flooding (and as winter approaches):

Boulder, CO 2013 by Dr. Rachelle Price, ND
With all the recent flooding here in Colorado, I recognize that some of you may be stranded in your homes with little resources. Others may be helping their neighbors pull out musty carpet, pump out basements or just trying to support your community and loved ones. Others may be reading this post just looking for ways to keep healthy as cold and flu season set in. Here are 10 things you can do to take care of yourself and your family, stay healthy and prevent illness.
With all the recent flooding here in Colorado, I recognize that some of you may be stranded in your homes with little resources. Others may be helping their neighbors pull out musty carpet, pump out basements or just trying to support your community and loved ones. Others may be reading this post just looking for ways to keep healthy as cold and flu season set in. Here are 10 things you can do to take care of yourself and your family, stay healthy and prevent illness.
- Stay calm and try not to worry about what you cannot control. Pay attention to your body and try to keep it relaxed. Conserve your energy if you are stranded.
- Rest and stay hydrated as much as you are able with clean water (boiled, bottled or treated) to allow your immune system to keep you healthy. You can add electrolytes if you have them or a pinch of salt and tablespoon of sugar to a liter of water.
- Support your immune system with what you already have in your cupboards. Take a multivitamin, Vitamin C 1,000mg 2-6 times/day, Elderberry syrup. Here is a list of immune supportive foods: ginger, onion, garlic, oranges/citrus, sweet potato, squash, cayenne pepper. Drinking fluids, getting rest, stress management and routine are the best things you can do to stay well.
- Keep your lungs healthy, especially in the mud and dampness and potential for mold and mildew growth these next few days and weeks. Get outside and breathe some fresh air if possible and move around to stay warm but allow the fresh air to circulate through your lungs. This is especially important if you are confined to a space that has mold, mildew or other air pollution concerns. Run a vaporizer with essential oils to purify the air. Most pure essential oils are anti-microbial. Some examples are eucalyptus, tea tree, lavender, orange, lemon and other citrus.
- Sleep and try to stay in a part of your house that was not affected by the flood, such as an upper level and is least likely to be near moisture and thus mold or mildew.
- If you are coughing or having any type of allergic symptoms (and to prevent these from happening), do the following: Steam inhalation –using pure or clean boiled water and an essential oil such as eucalyptus, thyme, oregano or tea tree, inhale the steam from a bowl of very hot water with a few drops of these oils placed in after boiling. Placing a towel over your head can help keep the steam in so you can be inhaling through your nose and mouth for 10 minutes or until it cools. Do this a few times a day, especially upon waking and before bed. Neti Pot Nasal Lavage – using pure or boiled water, add a ½ teaspoon of each salt and baking soda to approximately 1 cup of luke warm water. Use this as a nasal lavage 1-3 times/day to clean any fungus or other microbes from your nasal passages and prevent upper respiratory and sinus infections. If this concentration stings, adjust the amounts of salt and baking soda added.
- Try to manage your stress as much as you are able. As much as possible, do not come into contact with floodwater as many are contaminated with sewage and other waste. Do not eat food or drink water that has been touched by floodwater. Use gloves, boots and facemasks when cleaning up and even facemasks when sleeping if you are concerned about mold. If you can, run a dehumidifier, fans and open windows to dry things out and allow fresh air to circulate in your living spaces. Herbal teas that are relaxing: chamomile, passionflower, mints, skullcap. Magnesium, homeopathic rescue remedy, meditation and prayer can help in times of stress. If your nerves are making you nauseous or have digestive complaints, ginger tea can help settle your stomach. Taking 1-2 teaspoons of apple cider vinegar before meals can help with digestion.
- Try to find reasons to be grateful. Think as a group and take care of each other. If you are with others, give and receive comfort and support.
- Clean up well. Mold and mildew can be various colors and difficult to see. It can also grow under wood, carpet and other materials unseen to the eye. Be aware of suspicious smells and use a dehumidifier and fans to try to dry everything out. Also, as much as possible keep many windows open to allow fresh air inside. Use baking soda, vinegar and bleach to clean up your home. Hire an expert to assess and remove any molds and mildews.
- Use protective gear such as facial masks, gloves, rubber boots etc. Much of the floodwater was contaminated with sewage and especially as the water and mud dries up, dust in the air will go into your lungs, so it is especially important to wear a facemask to create a barrier between any potential mold or mildew in the air.
Cleaning Naturally
Dr. Rachelle Price, ND
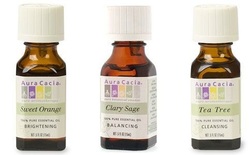
Home cleaning products are often full of toxic chemicals and can be expensive. I like to make my own simple solutions that usually involve vinegar, baking soda, lemon juice, castile soaps and essential oils. Using good quality essential oils is important for their anti-microbial action in the cleaner (and if you are using them to make anything you put on your skin, organic is best). Here is a simple all-purpose cleaner you can make at home. You can cut it down to any size you'd like. Putting it in a professional spray bottle makes a difference - it's worth it to spend a few dollars for it.
Home Made All- Purpose Cleaner:
Home Made All- Purpose Cleaner:
- 4 oz. Distilled White Vinegar
- 2 oz. Lemon Juice
- 1 oz. Liquid Soap (I like a castile soap such as Ballard Organics or Dr. Bronner's)
- 1 tsp. Baking Soda
- 5 oz water
- 10-50 drops of essential oils (tea tree, lavender, eucalyptus, orange...many essential oils are not only strong anti-microbial agents, they also smell great)
On a budget? Why eat organic?
Dr. Rachelle Price, ND

The age-old saying, we are what we eat, is literally true. Each cell in our body receives nourishment from what we put into our bodies. This includes the air we breath, the water we drink, the emotional energy we are around and of course what we eat.
We often don't realize what methods and chemicals are used in growing and getting the food we eat to our table. A main reason to eat organic is to minimize the harmful chemicals we ingest in eating conventional (non-organic) foods as well as to minimize the impact on our environment that these chemicals and farming methods create. Due to the higher soil quality, organic foods are often more nutrient and mineral dense as well, which means our cells get better nourishment.
The Environmental Working Group puts out annual guides on many health related topics, in this case the "Dirty Dozen". This guide is a list of the top 12 produce foods (fruits and vegetables) that should be eaten organic whenever possible, generally due to the chemicals used in the growing process. Click on the link above to find this list as well as the cleanest 12 foods available non-organically. The EWG Shopper's Guide is also a great resource that contains both the dirty dozen, the "clean 15", information on GMO's and more. You can also find these lists below.
Although it is generally more expensive, another category of food to consider eating organic is any animal based product such as dairy, meat and eggs. Because many toxins accumulate in fat, conventional (non-organic) animal products that we eat often have high levels of toxins, including hormones. The levels are generally higher in non-organic products partially because the animals are fed non-organic foods, hormones and antibiotics are often used as well as other chemicals that get transferred to our bodies and accumulate when we eat non-organic animal products. These toxins and hormones cause and contribute to many illnesses we currently experience, especially conditions of hormonal imbalances and suppressed immunity. We often do not know how pesticides, hormones and medicines in our foods affect us until the disease process is well underway. So, look for the USDA organic symbol (the image above) on produce and other foods to ensure that at least 95% of the ingredients used are organic and produced by organic means. This symbol also ensures that your food is GMO-free which means there have been no genetic manipulations and alterations!
Regarding genetically modified plants, or GMOs, there are a few foods to always choose organic due to the high prevalence of using genetically modified seeds in their production. I nearly always only eat organic corn and soy products. Field corn is used to make tortillas, chips, corn syrup, animal feed and biofuels. Soy is not only found in tofu, tempeh, soy sauce and other soy products but also often is in processed foods. Since U.S. law does not require labeling of GMO products, I advise people who want to avoid it to purchase the organically-grown versions of these items.
Again, we are what we eat so chose wisely. Prevention is the best medicine. An investment in your food is an investment in your health. It can also help prevent costly medical bills down the road and contribute to a higher quality of life for yourself, your community and the world. Regularly seeing your naturopathic physician is also an excellent way to prevent and reverse illness as well as obtain more information on how to optimize whole health for you and your family! See the tabs above for my bio and contact information if you are interested in learning more about how I may be able to help you.
Below are the EWG's 2013 Lists to help you make wise choices in regards to produce:
|
The "Dirty Dozen" -- Most Contaminated Produce Foods
*Plus: Collards & Kale, Summer Squash & Zucchini |
The "Clean 15" -- Least Contaminated Produce Foods
|
Eating a Simple, Whole-foods based diet:
I plan to write more about this later but to begin with here is a link to an article and video that talks about what a whole food is. To put it simply, you WILL be healthier if you focus on eating unprocessed, without additive WHOLE foods. Click on this link to hear more details from a wonderful teacher, chef and whole food guru, Cynthia Lair!
How to Select and Handle Seafood, a Healthy Meal Choice
From: http://www.eat-safe.com/Templates/InsideTemplate.aspx?PostingId=49
Eating fish strengthens the circulatory system and possibly the immune system. Omega-3s found in fish are important to
good health. The latest studies suggest a critical role in preventing birth defects in premature infants, easing depression and easing the symptoms of rheumatoid arthritis.
Even one fish meal a week can help to lower blood pressure, triglycerides and cholesterol thus decreasing the risk of heart
disease and some forms of cancer. This does not mean that you should limit yourself to just eating fish. The body still needs a variety of food for optimal health. In fact, most experts recommend 2-3 fish meals per week.
Although fish is appearing more frequently on the home table, 75% of fish meals are eaten in restaurants. Consumers still
have doubts about selecting and cooking fish at home. Mainly because "It smells up the house," and people “don't know how to tell if it is fresh." Some people also question the safety of fish.
To minimize the risk, try to avoid eating raw fish.
Selecting fresh fish is more difficult than cooking it. Most of us are forced to buy fish in a supermarket. If cooking fish smells up your house, it is not fresh! That fishy smell means the fish is decaying. Fresh fish has cucumber-like, sea-breeze smell.
Because fish is highly perishable, it must be kept very cold until ready to use. On a hot summer day, fresh fish can spoil in your car in thirty minutes. Transport fish in a cooler on ice or with an ice pack. Once home, store fish on a pan with ice cubes in the refrigerator or place the ice pack on top of it until ready to cook. Never store fish in the refrigerator for more than a day.
Follow these suggestions when selecting fish:
should be on top of ice.
looks fresher and it arrived today, buy the salmon. Ask when fish is usually delivered and try
to buy fish the same day it arrives.
with the brightest gills. Brown or gray means decay. Do not bother checking the eyes. The eyes
of some fish become cloudy and sunken immediately while others stay clear after the entire
body has rotted. Have the whole fish you have selected scaled, cut into steaks or filleted.
mackerel and swordfish should not have "rainbows" on the surface, it is a sign of decay. Press
a finger into the fish flesh. If it looks mushy or leaves a lasting impression, reject it and look
at another variety of fish.
Eating fish strengthens the circulatory system and possibly the immune system. Omega-3s found in fish are important to
good health. The latest studies suggest a critical role in preventing birth defects in premature infants, easing depression and easing the symptoms of rheumatoid arthritis.
Even one fish meal a week can help to lower blood pressure, triglycerides and cholesterol thus decreasing the risk of heart
disease and some forms of cancer. This does not mean that you should limit yourself to just eating fish. The body still needs a variety of food for optimal health. In fact, most experts recommend 2-3 fish meals per week.
Although fish is appearing more frequently on the home table, 75% of fish meals are eaten in restaurants. Consumers still
have doubts about selecting and cooking fish at home. Mainly because "It smells up the house," and people “don't know how to tell if it is fresh." Some people also question the safety of fish.
To minimize the risk, try to avoid eating raw fish.
Selecting fresh fish is more difficult than cooking it. Most of us are forced to buy fish in a supermarket. If cooking fish smells up your house, it is not fresh! That fishy smell means the fish is decaying. Fresh fish has cucumber-like, sea-breeze smell.
Because fish is highly perishable, it must be kept very cold until ready to use. On a hot summer day, fresh fish can spoil in your car in thirty minutes. Transport fish in a cooler on ice or with an ice pack. Once home, store fish on a pan with ice cubes in the refrigerator or place the ice pack on top of it until ready to cook. Never store fish in the refrigerator for more than a day.
Follow these suggestions when selecting fish:
- Shop at a store you trust to sell fresh fish. Look for fish displays with plenty of ice and
should be on top of ice.
- Be flexible. Buy the freshest looking fish. If you are shopping for tuna steaks but the salmon
looks fresher and it arrived today, buy the salmon. Ask when fish is usually delivered and try
to buy fish the same day it arrives.
- Whole fish stays fresh longer than fillets and steaks. Whole fish should look alive. They should
with the brightest gills. Brown or gray means decay. Do not bother checking the eyes. The eyes
of some fish become cloudy and sunken immediately while others stay clear after the entire
body has rotted. Have the whole fish you have selected scaled, cut into steaks or filleted.
- For pre-cut fillets and steaks avoid pieces with pink spots (usually bruises) or brown.
mackerel and swordfish should not have "rainbows" on the surface, it is a sign of decay. Press
a finger into the fish flesh. If it looks mushy or leaves a lasting impression, reject it and look
at another variety of fish.
Have a cough? Honey fares better than over the counter medicines...
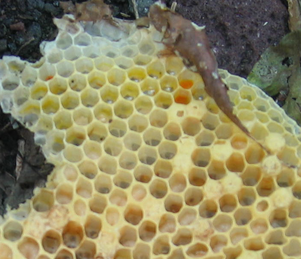
Even large research studies have shown better improvement in treating coughs with honey than with dextromethorphan, the active ingredient in over the counter cough medications such as Robitussin (see articles published in JAMA Pediatrics and Pediatrics). Honey is an age old remedy for coughs and sore throats. Mix a tablespoon or two with lemon juice and warm water for even better results. Caution: Do not give honey to infants under the age of one as in rare cases it can cause infantile botulism. As always, this remedy should not be a substitute for seeking direct medical advice from your doctor as a cough may be sign of serious illness that needs further attention.
Honey Onion Syrup for Coughs, Colds, Flus and Immune Support
Recipe written by Rosemary Gladstar | Rosemary’s Remedies ©2012 LearningHerbs.com, LLC
This is a wonderful “first” remedy for any home medicine maker. It’s as simple as adding honey
to a pan of onions. Seriously. This incredibly easy and delicious remedy for colds, flu’s, sore
throats, and coughs is a wonderful medicine for children and adults alike. You’ll be surprised
by the effectiveness and rapidity of this simple remedy.
Ingredients:
• 1 large Onion
• 1-2 cups Honey
*Optional: I (Rachelle) like to add a handful of each minced garlic and ginger as well
How To Make:
Cut onion in half, then cut into very thin discs (should look like thin moons). You may also add a few cloves of garlic (roughly chopped) or some fresh grated ginger to enhance taste. Put in a medium saucepan (Rosemary recommends a cast iron skillet), and add enough honey to lightly cover all of the cut
onions. Cook over low heat for 30 minutes, until onions get juicy and soft. Place in a glass jar and cover with lid and label (there is no need to strain). This will store in the refrigerator for several weeks.
How To Use:
Take by teaspoons when you feel a cold or flu coming on. Soothes coughs and boosts immune system. You may also eat the onions in syrup. They should be very soft. Give to children or adults as needed throughout the day.
Natural Remedies for Common Ailments and First Aid
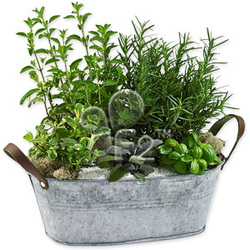
May 2012
These are my (Rachelle Price, ND) personal notes from a talk given by Herbalist and MD, Aviva Romm on May 3, 2012. In case of injury or emergency…staying calm and clear minded is the best thing we can do. Take a deep breath, step back and assess the situation. If it is an emergency, call 911 and accompany the person to emergency care. When in doubt, seek medical care.
Some symptoms that require medical care:
· Loss of consciousness or very lethargic/not very alert
· Copious or unstoppable bleeding
· Difficulty breathing
· Allergic reactions
· General swelling (can be anaphylaxis)
· Bad bites that have swelling afterwards or person is acting differently
· Eye injuries
· Serious wounds
· Infections that will not go away
· Any toxic exposure
· Extensive burns
· High fevers (over 103 in children) that will not lower no matter what you do.
Herbal First Aid Kit:
Basic things to always have on hand...
Miscellaneous (non-herbal):
· Butterfly bandages
· 4x4 sterile gauze for cleaning
· cloths (washcloths) for compresess
· cotton swabs (qtips) and cottonballs
· hydrogen peroxide
· thermometer
· scissors
· tweezers
· cotton balls
· organic sunscreen
· adhesive tape (I like micropore paper tape)
. thermometer
. ACE bandage
Herbal:
· Aloe vera – gel (for burns, bug bites) – no preservatives except vitamin C
· Arnica oil – bruises
· Calendula oil and tincture
· Chamomile tea
· Comfrey oil or salve
· Echinacea tincture
· Elderberry syrup
· Lemon balm tea
· Peppermint tea
· Plantain (use fresh or get a salve from fresh plantain)
· Tea tree oil
· witch hazel (from an over the counter pharmacy – not for oral use)
Herbal Remedies listed by Injury:
Bites and Stings
---Removal: Light a match blow it out and put it on the body of tick (away from where its bitten), or use tweezers. If it is the deer tick (tiny) and is embedded, go to the doctor (it takes 24 hours for a tick to pass on Lymes disease) and get antibiotic just in case. Bring tick in a jar into the doctor.
---Remove stinger (or it will continue to irritate) with fingers or tweezers.
---Treatment: in first 24 hours -- use poultice/paste. Bruise a fresh plantain leaf or mashed tobacco with water. Can use green clay. Use epi pen if allergic and go to ER immediately.
--If shortness of breath or swelling – go to Emergency Room immediately!
---Let it bleed a bit to clean it out
--- Should see doctor if any wild animal bites, see emergency room care!
Cuts and Scrapes
· First, help person stay calm. Then clean it out so you can take a good look at it
· Clean: closely with running water if possible. Can use squeeze bottle.
· Assess: how deep is it?
· Moist preparation (calendula, goldenseal, echinaea). Dilute 1 tsp tincture to 1/4 cup water and rinse with this. Keep rinsing and keep them open to dry (or use 4x4 gauze if large scrape to keep clean)
· Deep cuts: make sure it is really clean all the way to the base (if seeing deep tissue layers or bone, it always needs stiches). If edges come together well, use butterfly bandage and probably doesn’t need stiches. If won’t stop bleeding after 5 or so minutes, it may need stiches.
· After a few days use a salve. Comfrey root or healing salve as mentioned above
Bumps and Bruises
· Arnica oil – keep applying a few times a day
· If bruise easily, make sure they have enough vitamin C in diet and that they are not getting too much fish oil (EFA’s can increase bruising). Kids shouldn’t have more than 500-1,000 mg/day.
Sunburn
· Sun protection is better than sunscreen, though there are better choices these days (at least 30 SPF but more may not be better). Apply frequently every 2-3 hours and after water. Get ears, nose and small areas. More exposure to harmful UV radiation due to ozone layer depletion. So use lightweight clothing that covers their skin.
· We do need sunshine, for vitamin D and more
· Tx: Cool water until skin is cool to touch. Aloe vera gel. Diluted lavender oil (1 tsp. essential oil in 4 ounces of water in spray bottle). Constantly shake it up. Helps healing and discomfort. Witch hazel undiluted to area (cooling and anti-inflammatory). Give extra fluids to drink. Cooling herbal teas if over 1 year old (lemonbalm, honey suckle, mint) – a few teaspoons in 1 cup, covered and steeped for 10 minutes. Helps cool them down on the inside
After first few days: Calendula cream, oil or salve
Poison Ivy/Oak
· Learn what it looks like in your area
· The oil can stay on clothes for up to 20 years! So the first thing to do is always leave outdoor clothes outside or put directly into the laundry. Get in shower and use doctor bronner’s or soap that will strip the oils off your skin.
· For rash: baking soda or oatmeal baths. Use a sock and take a big handful of rolled oats (1/2 cup) and tie it up with a rubber band. Get into the bath and squeeze the sock under the water until you get the slippery liquid coming out and then squeeze it all over your skin. Do this a few times a day.
· If it goes systemic:
Seasonal Allergies (not including allergic anaphylaxis reactions to bee stings or food -- those are medical emergencies and should be dealt with my seeking immediate medical care)
· Excema and asthma may accompany this
· Studies show if raised around farm animals or pets, children have less allergies
· Sxs: Sniffles, dark circles under eyes, puffy eyes, behavior problems, restlessness, fatigue
· Treatment:
----Elderberry syrup – immune and lung tonic. Tastes great. Not sugar sweetened (glycerite form – planetary herbs makes a good one) 1-2 teaspoons a day
---- Butter burr (petascites) – reduces inflammation and frequency of allergies. Get PA free type or could cause liver damage! Dose range: 5 grams/day of liquid extract
----Quercitin 500mg three times/day
--– Bioflavonoids
----Blueberry extract – fresh dark berries!
These are my (Rachelle Price, ND) personal notes from a talk given by Herbalist and MD, Aviva Romm on May 3, 2012. In case of injury or emergency…staying calm and clear minded is the best thing we can do. Take a deep breath, step back and assess the situation. If it is an emergency, call 911 and accompany the person to emergency care. When in doubt, seek medical care.
Some symptoms that require medical care:
· Loss of consciousness or very lethargic/not very alert
· Copious or unstoppable bleeding
· Difficulty breathing
· Allergic reactions
· General swelling (can be anaphylaxis)
· Bad bites that have swelling afterwards or person is acting differently
· Eye injuries
· Serious wounds
· Infections that will not go away
· Any toxic exposure
· Extensive burns
· High fevers (over 103 in children) that will not lower no matter what you do.
Herbal First Aid Kit:
Basic things to always have on hand...
Miscellaneous (non-herbal):
· Butterfly bandages
· 4x4 sterile gauze for cleaning
· cloths (washcloths) for compresess
· cotton swabs (qtips) and cottonballs
· hydrogen peroxide
· thermometer
· scissors
· tweezers
· cotton balls
· organic sunscreen
· adhesive tape (I like micropore paper tape)
. thermometer
. ACE bandage
Herbal:
· Aloe vera – gel (for burns, bug bites) – no preservatives except vitamin C
· Arnica oil – bruises
· Calendula oil and tincture
· Chamomile tea
· Comfrey oil or salve
· Echinacea tincture
· Elderberry syrup
· Lemon balm tea
· Peppermint tea
· Plantain (use fresh or get a salve from fresh plantain)
· Tea tree oil
· witch hazel (from an over the counter pharmacy – not for oral use)
Herbal Remedies listed by Injury:
Bites and Stings
- Itchy bites (mosquitos) – plantain poultice (pound, chew), chickweed, aloe vera gel, healing salve (make it or buy it --- calendula oil, plantain, chickweed, witch hazel, goldenseal), green clay (1/2 tsp with 2 tsp of water and apply a thin layer of clay) in a one ounce salve jar. Do not pick or scratch (staph and MRSA come from this) – keep kids fingernails short and clean. Apple cider or white vinegar rinse undiluted.
- Tick bites – prevent them!
---Removal: Light a match blow it out and put it on the body of tick (away from where its bitten), or use tweezers. If it is the deer tick (tiny) and is embedded, go to the doctor (it takes 24 hours for a tick to pass on Lymes disease) and get antibiotic just in case. Bring tick in a jar into the doctor.
- Bee stings
---Remove stinger (or it will continue to irritate) with fingers or tweezers.
---Treatment: in first 24 hours -- use poultice/paste. Bruise a fresh plantain leaf or mashed tobacco with water. Can use green clay. Use epi pen if allergic and go to ER immediately.
--If shortness of breath or swelling – go to Emergency Room immediately!
- Dog bites (puncture wounds)
---Let it bleed a bit to clean it out
--- Should see doctor if any wild animal bites, see emergency room care!
Cuts and Scrapes
· First, help person stay calm. Then clean it out so you can take a good look at it
· Clean: closely with running water if possible. Can use squeeze bottle.
· Assess: how deep is it?
· Moist preparation (calendula, goldenseal, echinaea). Dilute 1 tsp tincture to 1/4 cup water and rinse with this. Keep rinsing and keep them open to dry (or use 4x4 gauze if large scrape to keep clean)
· Deep cuts: make sure it is really clean all the way to the base (if seeing deep tissue layers or bone, it always needs stiches). If edges come together well, use butterfly bandage and probably doesn’t need stiches. If won’t stop bleeding after 5 or so minutes, it may need stiches.
· After a few days use a salve. Comfrey root or healing salve as mentioned above
Bumps and Bruises
· Arnica oil – keep applying a few times a day
· If bruise easily, make sure they have enough vitamin C in diet and that they are not getting too much fish oil (EFA’s can increase bruising). Kids shouldn’t have more than 500-1,000 mg/day.
Sunburn
· Sun protection is better than sunscreen, though there are better choices these days (at least 30 SPF but more may not be better). Apply frequently every 2-3 hours and after water. Get ears, nose and small areas. More exposure to harmful UV radiation due to ozone layer depletion. So use lightweight clothing that covers their skin.
· We do need sunshine, for vitamin D and more
· Tx: Cool water until skin is cool to touch. Aloe vera gel. Diluted lavender oil (1 tsp. essential oil in 4 ounces of water in spray bottle). Constantly shake it up. Helps healing and discomfort. Witch hazel undiluted to area (cooling and anti-inflammatory). Give extra fluids to drink. Cooling herbal teas if over 1 year old (lemonbalm, honey suckle, mint) – a few teaspoons in 1 cup, covered and steeped for 10 minutes. Helps cool them down on the inside
After first few days: Calendula cream, oil or salve
Poison Ivy/Oak
· Learn what it looks like in your area
· The oil can stay on clothes for up to 20 years! So the first thing to do is always leave outdoor clothes outside or put directly into the laundry. Get in shower and use doctor bronner’s or soap that will strip the oils off your skin.
· For rash: baking soda or oatmeal baths. Use a sock and take a big handful of rolled oats (1/2 cup) and tie it up with a rubber band. Get into the bath and squeeze the sock under the water until you get the slippery liquid coming out and then squeeze it all over your skin. Do this a few times a day.
· If it goes systemic:
- Licorice tincture or liquid extract (get DGL – free if High blood pressure)
- Chinese skullcap (scutelleria bicalensis)
- Figwort (scrofularia) – optional (herb pharm has it)
- Mix in equal parts and take 2 dropperfuls in a bit of warm water or juice for kids, every 2 hours (do the topicals as well)
- Can use Benadryl OTC (safe for kids age 5 and over. Dose: 12.5-25 mg before bed)
- Hot water may help with the itch
Seasonal Allergies (not including allergic anaphylaxis reactions to bee stings or food -- those are medical emergencies and should be dealt with my seeking immediate medical care)
· Excema and asthma may accompany this
· Studies show if raised around farm animals or pets, children have less allergies
· Sxs: Sniffles, dark circles under eyes, puffy eyes, behavior problems, restlessness, fatigue
· Treatment:
- Diet: keep common allergens out (dairy, eggs, citurs, peanuts, fish), avoid sugars (juice, simple carbs), healthy
- Reduce: feather pillows, dust, dander
- Vitamin D – 1,00-2,000mg per day if over 7 years old (400-1,00mg per day for kids under 7)
- Fish oils
- Proteins
- Herbs to have on hand:
----Elderberry syrup – immune and lung tonic. Tastes great. Not sugar sweetened (glycerite form – planetary herbs makes a good one) 1-2 teaspoons a day
---- Butter burr (petascites) – reduces inflammation and frequency of allergies. Get PA free type or could cause liver damage! Dose range: 5 grams/day of liquid extract
----Quercitin 500mg three times/day
--– Bioflavonoids
----Blueberry extract – fresh dark berries!
An Apple A Day Keeps the Doctor Away...
Dr. Rachelle Price, ND
So we’ve heard it said, “an apple a day keeps the doctor away. “ Well, there is some truth to this considering the intestinal benefits of eating the type of fiber found in apples. And it’s not just in apples… Apples, carrots, green peppers, broccoli, pears, unprocessed brans and other foods on the list below all contain insoluble fiber. This fiber helps keep the digestive system regular, ridding the body of waste products and toxins. The insoluble fiber found in these vegetables, fruits and brans also helps the body excrete excess cholesterol, supporting cardiovascular health as well. Increasing the amount of insoluble fiber in your food choices can help to keep your skin and heart healthy, support your mood and help with constipation amongst many other benefits. So start enjoying an apple a day…or better yet, consider incorporating many of these foods into your daily snacks and meals.
So we’ve heard it said, “an apple a day keeps the doctor away. “ Well, there is some truth to this considering the intestinal benefits of eating the type of fiber found in apples. And it’s not just in apples… Apples, carrots, green peppers, broccoli, pears, unprocessed brans and other foods on the list below all contain insoluble fiber. This fiber helps keep the digestive system regular, ridding the body of waste products and toxins. The insoluble fiber found in these vegetables, fruits and brans also helps the body excrete excess cholesterol, supporting cardiovascular health as well. Increasing the amount of insoluble fiber in your food choices can help to keep your skin and heart healthy, support your mood and help with constipation amongst many other benefits. So start enjoying an apple a day…or better yet, consider incorporating many of these foods into your daily snacks and meals.
Some Food Sources of Insoluble Fiber:
Vegetables Whole Grains Fruit
|
Broccoli
Cabbage Carrots Cucumber with Skin Green Peppers Green Beans Peas Wax Beans Eggplant Brussels Sprouts Mustard Greens Beet Root Radishes |
Whole Wheat
Bran Cereals Unprocessed Bran Whole Grains |
Apples
Pears Strawberries |
How to Choose a Safe Lunch Box Container
From Bastyr University's Website -- click link www.bastyr.edu/news/health-tips-spotlight-1/2013/02/how-choose-safe-lunch-box-container
Monday, March 4, 2013
Keep nasty toxins away from your lunch with these simple steps:
When it comes to choosing a lunch box container, most people prefer plastic containers over glass or ceramic. Plastic containers are lighter to carry, can easily be popped into the microwave, and most come with leak-proof lids. However, choosing the right kind of plastic container is very important, since it impacts not only our health, but also our environment. Here’s a simple guide to choosing safe lunch boxes.
Symbols: What do they tell you?The symbols at the bottom of a container can tell you if it's recyclable, microwave-safe, dishwasher-safe, freezer-safe, or even safe for food storage at all. It is best to avoid buying containers without these symbols, because their "safe for consumer" status is questionable.
SymbolIndication - check out the original link above to see the symbols and what they mean
The letter(s) under each number is a short form for the kind of plastic used in making containers. Numbers 2, 4 and 5 are considered safe for food storage, while 1, 3, 6 and 7 are not recommended. Number 3 (V or PVC) stands for polyvinylchloride.
Avoiding PVCAccording to the Washington Toxics Coalition, lunch boxes made with PVC contain high levels of lead, which can leach into our food on storing and/or heating. There are several reasons to avoid lead:
— By Dharti Shah, Bastyr dietetic intern, and Debra Boutin, MS, RD, chair and dietetic internship director, Department of Nutrition and Exercise Science at Bastyr University.
Monday, March 4, 2013
Keep nasty toxins away from your lunch with these simple steps:
When it comes to choosing a lunch box container, most people prefer plastic containers over glass or ceramic. Plastic containers are lighter to carry, can easily be popped into the microwave, and most come with leak-proof lids. However, choosing the right kind of plastic container is very important, since it impacts not only our health, but also our environment. Here’s a simple guide to choosing safe lunch boxes.
Symbols: What do they tell you?The symbols at the bottom of a container can tell you if it's recyclable, microwave-safe, dishwasher-safe, freezer-safe, or even safe for food storage at all. It is best to avoid buying containers without these symbols, because their "safe for consumer" status is questionable.
SymbolIndication - check out the original link above to see the symbols and what they mean
The letter(s) under each number is a short form for the kind of plastic used in making containers. Numbers 2, 4 and 5 are considered safe for food storage, while 1, 3, 6 and 7 are not recommended. Number 3 (V or PVC) stands for polyvinylchloride.
Avoiding PVCAccording to the Washington Toxics Coalition, lunch boxes made with PVC contain high levels of lead, which can leach into our food on storing and/or heating. There are several reasons to avoid lead:
- Lead has been linked with birth defects and known to harm children’s learning and behavior.
- Lead leaches into waste water from dishwashing machines, polluting water systems.
- Glass and ceramic containers with leak-proof lids are convenient.
- Stainless steel or metal containers are easy to carry but are not microwave-safe.
— By Dharti Shah, Bastyr dietetic intern, and Debra Boutin, MS, RD, chair and dietetic internship director, Department of Nutrition and Exercise Science at Bastyr University.
A Recipe for Natural Homemade Sunscreen:
By: http://web.archive.org/web/20131019124020/http://frugallysustainable.com/2012/03/a-recipe-for-natural-homemade-sunscreen
MARCH 30, 2012 BY ANDREA
With spring here, and the anticipation of outdoor adventures on the horizon, now’s the perfect time to start talking about natural protection from the sun!
We all know that protecting our skin — the body’s largest organ – from the sun is super important; but sadly, so many of the commercially-prepared sunscreens on the market are laden with harmful chemicals that could actually end up exposing us to the very toxins we are trying to protect ourselves from.
The good news is…there are ways to make your own natural sunscreens at home – not only will this save you money, but it will give you greater peace of mind in knowing exactly what has gone into making it.
Tips for Natural Sun Protection
One hundred years ago the majority of jobs involved working outdoors yet the sunscreen craze was no where to be found – neither was skin cancer. Sure, there were a few cases, but it’s interesting to me that with the increase sales of sunscreen the rate of skin cancer has also increased.
As just a little side note, my goal here is not to persuade you in your thinking but rather I want to challenge you to begin the research on your own. There are some really great articles out that have helped shape my opinion surrounding this issue, such as this one by Environmental Working Group (EWG) that describes the dangers of chemical sunscreens, and this one, oh…and you may like this one too. Ultimately the decision is yours and my suggestions here are purely for educational purposes. I strongly encourage you to do your own research and follow conventional wisdom.
So what did the people in years gone by know that we don’t? Well, they:
-were a bit more modest in their dress and wore lots of protective clothing.
-they knew to stand in the shade if at all possible.
-they avoided direct exposure to the noon sun.
-their diets were wholesome and consisted of real foods.
Did you know that we can dramatically improve our resistance to the sun’s harmful rays through dietary changes! Yes! Our skin is our largest organ right? So that means, when our immune system is functioning on low due to an over consumption of processed foods we weaken our first line of defense and place ourselves at greater risk.
I love that seasonal summer foods — such as strawberries, blueberries, raspberries, cherries (and fruits of all kinds), beans, nuts, and a variety of legumes — are some of the highest antioxidant foods on the planet…just what our bodies’ need for healthy skin and natural sun protection.
Ingredients that Naturally Protect Us from the Sun
There are natural ingredients, some may be found in our kitchens, that work to protect us from over exposure to the sun. Many are oils that contain SPF properties such as:
In order to make your own sunscreen you really should add the natural mineral zinc oxide (and possibly titanium oxide) to your recipe. This will give you real power to reflect the sun’s ray, with minimal negative effects.
Natural Sunscreen Recipe:
Ingredients:
Customize this recipe based on your budget and what you have available.
-1 ounce oil blend (use any combination of the oils listed above)
-1 ounce beeswax (adds waterproof properties)
-1 ounce butter blend (i.e. Shea butter, mango butter, or cocoa butter)
-1 teaspoon vitamin E oil
-0.36 ounces zinc oxide powder
-30 drops essential oils, optional
Method:
1. Gather ingredients and kitchen tools. Note: Many of the oils listed above can be found in the grocery store or health food store. I love the quality and cosmetic properties of the oils, essential oils, and butters available from Mountain Rose Herbs. They are my source for these things. Find beeswax here or search for a local source by clicking here.
2. In a double boiler, over low heat, melt the oils, beeswax, and butters.
3. Remove from heat and allow to cool slightly prior to adding the vitamin E oil, zinc oxide powder, and essential oils. Note: Wear a mask when working with zinc oxide. Although it has not been proven harmful when used topically, inhaling the substance can be dangerous.
4. Stir until zinc oxide is dissolved. Note: Purchase zinc oxide powder here.
5. Pour into a push-up or roll-up dispenser. This recipe will produce a product similar to a lotion bar or sunscreen stick. You could easily clean out and re-purpose a used deodorant or lip balm container. But, if you want to buy a new one…I love these containers.
6. Allow to cool and harden on the counter overnight and then you’re good to go! During times of heavy sun and swim exposure be sure to reapply often for the best coverage.
Notes
-This recipe contains zinc oxide at 12% which gives it an SPF of around 10-12 (note: this has not been approved or tested). See this awesome chart to reduce or increase the amount of zinc oxide based on your family’s needs. Have a question about it? Ask it in the commentsand we’ll figure it out together
-Want to reduce your cost of the products used to make this recipe? Call together a group of like-minded friends, ask them if they are interested in making this recipe with you, and split the costs!
-Beneficial, sun protecting essential oils include lavender, myrrh, carrot seed oil, and peppermint. Read more here…
-Want to stick your favorite brand of sunscreen? Don’t feel bad about that! There are a few really good companies out there working hard to provide safe and effective products. Go to EWG’s website to check your commercial sunscreen’s level of chemical contaminants byclicking this link.
-Don’t shun the sun completely! Our fear of the sun has precipitated a societal vitamin D deficiency that is unfortunately taking us by storm — potentially producing an increase rate of cancers, autism, asthma, heart disease, and mental illness, just to name a few.
-This is the recipe that I have used for my family here in the Arizona desert for years with great results. However, I can not guarantee that yours will be the same experience because it has not been tested in an FDA approved lab. In other words, by sharing this recipe with you, I hope you understand that I will not be held responsible for any adverse reactions, sunburns, or skin cancers.
-Looking for products mentioned in this post? Mountain Rose Herbs is my go-to for all my oil, moisturizing butters, and essential oil needs! Find beeswax here.
By: http://web.archive.org/web/20131019124020/http://frugallysustainable.com/2012/03/a-recipe-for-natural-homemade-sunscreen
MARCH 30, 2012 BY ANDREA
With spring here, and the anticipation of outdoor adventures on the horizon, now’s the perfect time to start talking about natural protection from the sun!
We all know that protecting our skin — the body’s largest organ – from the sun is super important; but sadly, so many of the commercially-prepared sunscreens on the market are laden with harmful chemicals that could actually end up exposing us to the very toxins we are trying to protect ourselves from.
The good news is…there are ways to make your own natural sunscreens at home – not only will this save you money, but it will give you greater peace of mind in knowing exactly what has gone into making it.
Tips for Natural Sun Protection
One hundred years ago the majority of jobs involved working outdoors yet the sunscreen craze was no where to be found – neither was skin cancer. Sure, there were a few cases, but it’s interesting to me that with the increase sales of sunscreen the rate of skin cancer has also increased.
As just a little side note, my goal here is not to persuade you in your thinking but rather I want to challenge you to begin the research on your own. There are some really great articles out that have helped shape my opinion surrounding this issue, such as this one by Environmental Working Group (EWG) that describes the dangers of chemical sunscreens, and this one, oh…and you may like this one too. Ultimately the decision is yours and my suggestions here are purely for educational purposes. I strongly encourage you to do your own research and follow conventional wisdom.
So what did the people in years gone by know that we don’t? Well, they:
-were a bit more modest in their dress and wore lots of protective clothing.
-they knew to stand in the shade if at all possible.
-they avoided direct exposure to the noon sun.
-their diets were wholesome and consisted of real foods.
Did you know that we can dramatically improve our resistance to the sun’s harmful rays through dietary changes! Yes! Our skin is our largest organ right? So that means, when our immune system is functioning on low due to an over consumption of processed foods we weaken our first line of defense and place ourselves at greater risk.
I love that seasonal summer foods — such as strawberries, blueberries, raspberries, cherries (and fruits of all kinds), beans, nuts, and a variety of legumes — are some of the highest antioxidant foods on the planet…just what our bodies’ need for healthy skin and natural sun protection.
Ingredients that Naturally Protect Us from the Sun
There are natural ingredients, some may be found in our kitchens, that work to protect us from over exposure to the sun. Many are oils that contain SPF properties such as:
- Raspberry Seed Oil. The highest of all natural ingredients, contains an estimated SPF of 30-50.
- Shea Butter. An excellent skin protectant with an SPF of approximately 6-10.
- Carrot Seed Oil. Carrot seed oil is an essential oil and has been estimated to contain SPF levels of 30.
- Wheat Germ Oil. While super nourishing for the skin, it too possesses a natural SPF of 20.
- Sesame oil, Coconut Oil, Hemp oil, Avocado oil, Soybean, and Peanut Oil. All contain SPF levels between 4-10.
In order to make your own sunscreen you really should add the natural mineral zinc oxide (and possibly titanium oxide) to your recipe. This will give you real power to reflect the sun’s ray, with minimal negative effects.
Natural Sunscreen Recipe:
Ingredients:
Customize this recipe based on your budget and what you have available.
-1 ounce oil blend (use any combination of the oils listed above)
-1 ounce beeswax (adds waterproof properties)
-1 ounce butter blend (i.e. Shea butter, mango butter, or cocoa butter)
-1 teaspoon vitamin E oil
-0.36 ounces zinc oxide powder
-30 drops essential oils, optional
Method:
1. Gather ingredients and kitchen tools. Note: Many of the oils listed above can be found in the grocery store or health food store. I love the quality and cosmetic properties of the oils, essential oils, and butters available from Mountain Rose Herbs. They are my source for these things. Find beeswax here or search for a local source by clicking here.
2. In a double boiler, over low heat, melt the oils, beeswax, and butters.
3. Remove from heat and allow to cool slightly prior to adding the vitamin E oil, zinc oxide powder, and essential oils. Note: Wear a mask when working with zinc oxide. Although it has not been proven harmful when used topically, inhaling the substance can be dangerous.
4. Stir until zinc oxide is dissolved. Note: Purchase zinc oxide powder here.
5. Pour into a push-up or roll-up dispenser. This recipe will produce a product similar to a lotion bar or sunscreen stick. You could easily clean out and re-purpose a used deodorant or lip balm container. But, if you want to buy a new one…I love these containers.
6. Allow to cool and harden on the counter overnight and then you’re good to go! During times of heavy sun and swim exposure be sure to reapply often for the best coverage.
Notes
-This recipe contains zinc oxide at 12% which gives it an SPF of around 10-12 (note: this has not been approved or tested). See this awesome chart to reduce or increase the amount of zinc oxide based on your family’s needs. Have a question about it? Ask it in the commentsand we’ll figure it out together
-Want to reduce your cost of the products used to make this recipe? Call together a group of like-minded friends, ask them if they are interested in making this recipe with you, and split the costs!
-Beneficial, sun protecting essential oils include lavender, myrrh, carrot seed oil, and peppermint. Read more here…
-Want to stick your favorite brand of sunscreen? Don’t feel bad about that! There are a few really good companies out there working hard to provide safe and effective products. Go to EWG’s website to check your commercial sunscreen’s level of chemical contaminants byclicking this link.
-Don’t shun the sun completely! Our fear of the sun has precipitated a societal vitamin D deficiency that is unfortunately taking us by storm — potentially producing an increase rate of cancers, autism, asthma, heart disease, and mental illness, just to name a few.
-This is the recipe that I have used for my family here in the Arizona desert for years with great results. However, I can not guarantee that yours will be the same experience because it has not been tested in an FDA approved lab. In other words, by sharing this recipe with you, I hope you understand that I will not be held responsible for any adverse reactions, sunburns, or skin cancers.
-Looking for products mentioned in this post? Mountain Rose Herbs is my go-to for all my oil, moisturizing butters, and essential oil needs! Find beeswax here.
Homemade Remineralizing Toothpaste:
From: The Paleo Mama at www.thepaleomama.com/2013/12/diy-remineralizing-toothpaste/
INGREDIENTS:
1/3 cup of Bentonite Clay (where to buy)- this comes from pure sources of undisturbed
deposits in the ground. What is special about bentonite clay is that it draws toxins out of
the body.
1/4 cup of boiling water
1 Tablespoon of coconut Oil (where to buy) – coconut oil is amazing for oral health. It is
highly effective with getting rid of viruses and bacteria in the mouth
1/4 teaspoon of Real Salt (where to buy) – real salt is unrefined and full of natural
minerals.
1/2 teaspoon of REAL stevia (where to buy)- this is the dry herb that is green and
unprocessed in it’s natural form.
15 Drops of OnGuard (or Thieves) Essential oil (where to buy) – OnGuard essential oil is
full of antibiotic properties and is known for killing germs (or cavities)!
10 Drops of Peppermint Essential oil (where to buy) – this gives the toothpaste a great
flavor and helps to freshen breath
DIRECTIONS:
Step One: Put your bentonite clay in a bowl. Heat the water on the stove and then stir in
the coconut oil till it is melted.
Step Two: With a hand mixer, mix on medium speed the bentonite clay and the
water/oil mixture till blended through.
Step Three: Add the salt, stevia, and essential oils and continue to blend until it is
completely blended.
Step Four: Keep in a covered jar!
*The mixture will harden a little bit as it sits because of the coconut oil. This makes it
easier to add a bit to your toothbrush when you brush.
